1. Kit #13 Has a New Owner
2. Builder Visit w/ Bud Tedesco (Kit #16)
3. Redding Air Show
4. Bryan (Kit #007) Progress
5. Work on Tailwheel Struts
6. First Attempt At Bend Radius Jig
7. Added DRO to Bridgeport Mill Quill
8. Installed 3 Jaw Chuck on Lathe
9. Purchased a MIG welder
Overall, we're continuing to make progress on our first aircraft and Prowler the company. There is much to do to structure what we do now to make it repeatable in the future. Generally, when we work on the airplane we don't get much done on the company. And, when we work on the company, we don't get a lot done on the actual aircraft. But, all in due time. On with the update.
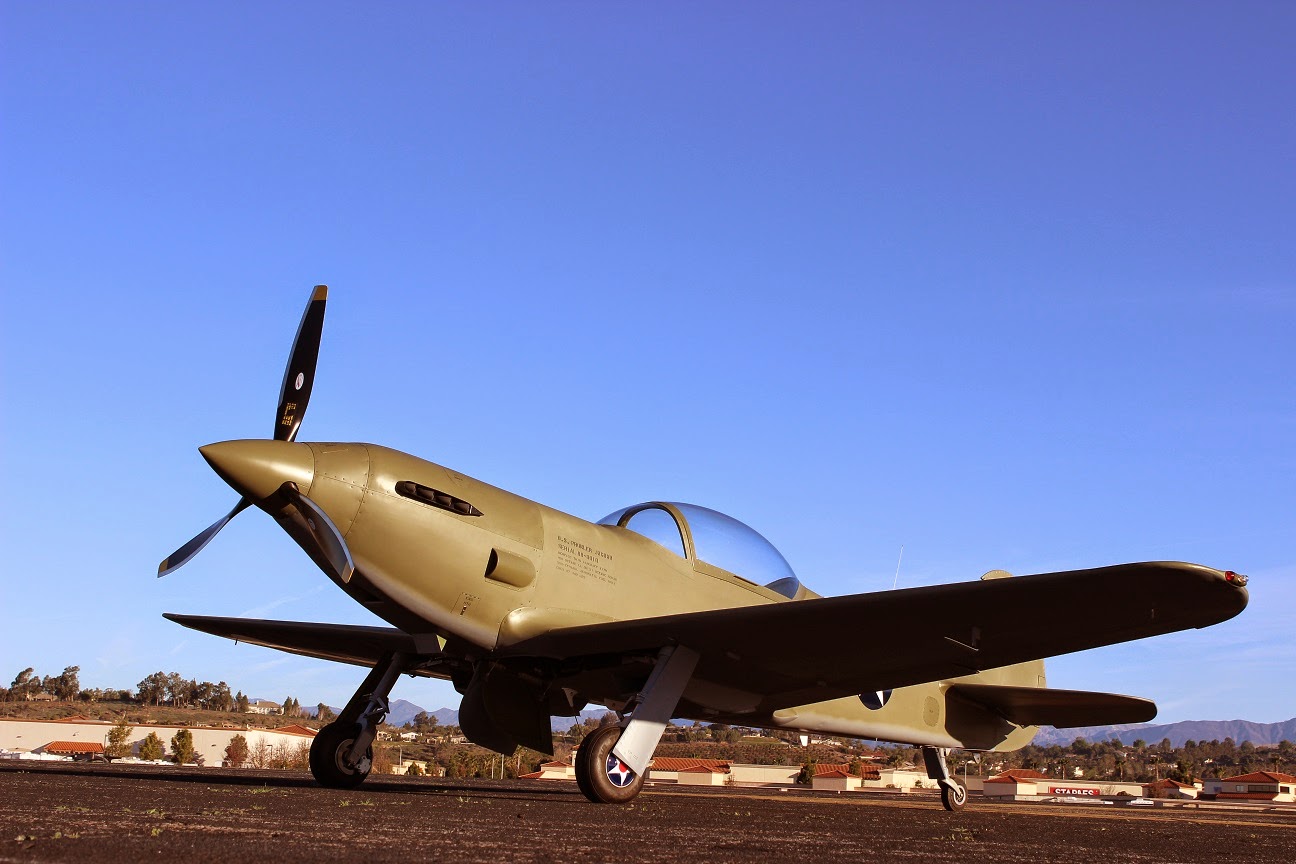
1. Kit #13 Has a New Owner - You may remember from our JAN09 post that Rick in Memphis purchased the RW&B aircraft (Kit #001) and also Kit #013 from the former owner in JAX. After reviewing and inventorying all of the parts, Rick decided to put Kit #013 up for sale. The kit was recently purchased by Roy Farris of Franklin, IN. Roy should take custody of the kit within the next few weeks. We'll pass along any new information once Roy gets his kit. Here's a couple of pix of Kit #013 taken when Rick was purchasing it earlier.

.jpg)
.jpg) Congratulations Roy! We look forward to working with you in getting your airplane together and flying. Please send us your pix and your thoughts that we can share with everyone.
Congratulations Roy! We look forward to working with you in getting your airplane together and flying. Please send us your pix and your thoughts that we can share with everyone.2. Builder Visit w/ Bud Tedesco (Kit #16) - On a recent trip to MCO for recurrent training, I was able to get up to Mount Dora, FL and visit Bud and see his aircraft. He's doing a fabulous job on it and is hoping to have it flying by the end of the year! Nearly all the systems have been installed and tested. He is currently working on installing all of the fairings and finishing up odds-n-ends. Here are a few pix of Bud's Beauty:


 So far, Bud is the only builder that has incorporated a sliding canopy design into his Prowler. He came up with an ingenious design that allows it to work on a cockpit that is wider at the front than at the back. We'll look at incorporating this into our aircraft. BTW - that's Bud waving from the cockpit in the first picture above. Great job Bud - we'll keep tracking your progress. Hope you make your goal to have your aircraft fly this year.
3. Redding Air Show - The promoters of the Redding Air Show called George this year and asked him if he would, again, display his Prowler at the air show. He agreed and we spent Thurs before the airshow getting Kit #005 out of storage, towing it up to KRDD, putting the wings on, and giving it a much needed bath. This was our first opportunity to see how the airplane is taken on and off of the trailer, how the wings are put on and taken off, and enjoy seeing folks enjoy the airplane. There is now doubt about it - this airplane gets lots and lots of looks!

 We may have gotten even more looks if it hadn't been 112F on the field that Saturday! It was hot, but it was a great show. Of Course, these guys always get the most looks!
4. Bryan's (Kit #007) Progress - A bit of a slowdown at work has allowed Bryan to really get some work done on his Prowler. He recently sent me a video of his flap operating system in operation. He chose an updated version of the electric linear actuator that George and others have used to operate the flaps. This design has a ball-screw drive with automatic clutching at each end. This negates the need for limit switches, provided that you get the correct stroke length. It does, however, require that a different mounting system be created to attach the fwd end of the actuator to the bulkhead. Here's a video:
http://www.blogger.com/video-play.mp4?contentId=76805bafaeb2cb07&type=video%2Fmp4
NOTE: Bryan also requested us to ask if there are any current builders out there that need the high tensile wing bolts - please contact us. He is going to order some of them and will order enough for everyone. These are sold only in lots of 10 (w/ certification paperwork). He will order enough to get everyone what they need and divide them up when received. Email us for details.
5. Work on Tailwheel Struts - We've ordered the stock material for the tailwheel struts and identified a machine shop to begin making these from our newly made drawings (see previous post). This is to support the current builders that are in need of these items. While we're at it, we'll make a couple extra struts - one for our aircraft and one for possible future needs. Here's an updated 3D version of the TW strut since we "tweaked" the design a little.
 We should have some new pix for the next update.
6. First Attempt At Bend Radius Jig - We made a first try at making a bending radius jig to make bending 2024-T3 in the box brake easier and faster to do. Since we have a lot of this type of forming to do now (and even more in the future) we are putting time into making these processes very quick and efficient so production can be as efficient as possible. So, we tried welding a 1/4" round stock to the edge of a 1/4" piece of flat bar to create a "jig" to lay on top of the material to bend in the brake. Unfortunately, the heat from the welding stitches caused the jig to warp and made it unusable. In addition, we found out the the top fingers on the brake cannot be adjusted back far enough to accommodate this design. So, we're on to "Plan B" and should have some more info and pix in the next update. If at first you don't succeed - try, try again.
7. Installed DRO on Bridgeport Mill Quill -
This project turned out much more successfully than the one mentioned above. For less than $40 (including shipping) we purchased one of these quill DRO's. It did not, however, come with the mounting hardware - so a little imagination and fabrication were in order. Here's what we came up with.
 We have one more idea to make this more practical and useful. More to follow.
8. Installed 3 Jaw Chuck on Lathe - Last year we purchased a older used lathe and restored it back to a usable condition. It came with a 4 inch 4 jaw chuck, but we need the convenience of a 3 jaw chuck so we purchased one from ENCO. Trouble was, this lathe is so old that no one makes a back plate for mounting the chuck (uses a 1-1/4" 12tpi fastener to thread onto the lathe spindle). So, we had to make one. First step is to weld a 1-1/4" 12 tpi nut to a piece of 1/2" plate that has a 1" hole cut through it. Next, put it on the lathe to true up the face and side. Also, cut a shoulder on the edge to give a raised area which will fit into a recess on the back of the chuck (ensures it is concentric when installed on back of chuck). Drill 3 holes to bolt the back plate onto the chuck:
 Install the back plate onto the chuck:
 Install the completed chuck and back plate onto the lathe.
 The dial indicators says run-out is less than 0.003" from side to side (less than 0.0015" from center to OD of the chuck). Good to go! Eventually we'll get a bigger and better lathe and this will be converted and set up to make one or two specific parts. But for now, we can use it to make several of the aircraft parts as well as general shop work.
9. Purchased a MIG Welder-
To facilitate making many of the jigs, tooling and other items needed to produce Prowler parts we needed to purchase a MIG welder. After months of watching the local classified and craigslist we found the right package at a great price. It's already been put to good use and it welds great. Of course, all the weldments for the aircraft parts will all be TIG welded (which we will outsource to a qualified welder initally). However, eventually we hope to purchase a TIG welder and take welding courses to bring this part of production in house as well.
Those are the high points for this installment. Next post we'll have a more complete update on the status of all the builders and their aircraft. Thanks for checking in on us and look for a Halloween update.
 Next, put it on the lathe to true up the face and side. Also, cut a shoulder on the edge to give a raised area which will fit into a recess on the back of the chuck (ensures it is concentric when installed on back of chuck). Drill 3 holes to bolt the back plate onto the chuck:
 Install the back plate onto the chuck: Install the completed chuck and back plate onto the lathe.
  The dial indicators says run-out is less than 0.003" from side to side (less than 0.0015" from center to OD of the chuck). Good to go! Eventually we'll get a bigger and better lathe and this will be converted and set up to make one or two specific parts. But for now, we can use it to make several of the aircraft parts as well as general shop work.
9. Purchased a MIG Welder-
To facilitate making many of the jigs, tooling and other items needed to produce Prowler parts we needed to purchase a MIG welder. After months of watching the local classified and craigslist we found the right package at a great price.
 It's already been put to good use and it welds great. Of course, all the weldments for the aircraft parts will all be TIG welded (which we will outsource to a qualified welder initally). However, eventually we hope to purchase a TIG welder and take welding courses to bring this part of production in house as well.
Those are the high points for this installment. Next post we'll have a more complete update on the status of all the builders and their aircraft. Thanks for checking in on us and look for a Halloween update.