Well, as usual, the summer was a busy one. After the last blog update in May, the day job got busy, the kids got out of school and summer vacations got going. Before I knew it, almost 5 months had gone by. Holy Cow!
Here's the list of items in this update:
PROWLER ITEMS:
1. 400 Ton Press Status:
2. Making Parts For Ernest
3. Making Parts For Kit #18
4. Visit From Bryan
5. Visit To See Ray
6. Updates From Francis
NON-PROWLER ITEMS:
7. AirVenture 2015
8. Backup Diesel Generator Shed
9. Family Ride in the EAA Ford Tri-Motor
10. A Fun New Project
11. Of Course, More Retaining Wall Work
As always, thank you for your interest in the Prowler aircraft and looking up the blog to check on our progress. Before I get going on the list of update items, I just wanted advertise the Prowler kits that Bryan and I have for sale. We still have kits available and you can read about them in a previous update here:
Prowler Kits For Sale.
Also, lately I have been breaking the updates up into "Prowler Related" and "Non-Prowler Related" sections. I'm doing this for those that might just want to get the low-down on the items just related to the airplane. The Non-Prowler stuff is either aviation related info that is not directly connected to Prowler Aviation, or it is about other activities and projects that I'm working on. This helps me document my time spent on other things that indirectly supports Prowler Aviation and, hopefully, gives you more insight into what's going on in my world. By dividing the updates up this way, I hope that it makes it easy for everyone to get the information they want and can skip the information that is not as interesting to them.
One other thing that I wanted to mention. A while back, someone asked me if I could put links to the photos in the blog to get larger pictures. I've found out that (using MS Windows) if you place your cursor over each picture and right click and then select "Save Picture As" - you can store it on your computer in a local folder. Then, you can go back later and open the picture using any photo application and it should be full sized.
And now, on with the update.
PROWLER ITEMS:
1. 400 Ton Press Status - When I finished the last blog update, I had gotten started on machining my bolster to flatten it out (after welding) and getting it to the correct size to fit inside the rubber box. Here are a few pics of that:
This is about an 800lbs slab of steel setting on the mill table and about all that my mill can handle. If fact, it couldn't do the entire length or width of the slab in one shot. I had to machine one end and then move the bolster to the other end, set it all up again, and then finish the other end. It was a pain, but saved me $300-$400 to have it done at a machine shop with a larger mill:
Once I had it finished, I stacked the bolster and all of the other pieces of the press outside for the summer....I needed room in the shop. However, now summer is over and the rainy season is on the way, so I had to get busy and clean all the parts of the press up and get them painted. Here's the stack of press parts all painted up and ready to put back on the press.
Here's a key to help me remember where all the pieces of this puzzle go back together, once I get the press seal cavity repaired and get the new seal in it:
I don't want these parts sitting out in the rain getting rusty again, so I stacked them back in the shop. Here's the a pic of all the pieces.
Initially, I was going to do a "semi-permanent" repair to this seal cavity wall and use the Belzona that I bought for it. But, lately I've changed my mind and decided that I want to do the permanent repair to the lower part of the press.
Since I already have it mostly torn down, now is the time to do it right. I just need to take the top and the sides off. That would leave just the "pot" to take to a machine shop to have the wall of the seal cavity bore-sight welded and then turned back down in a large lathe or a horizontal mill. The problem is, "just" taking the top and sides off is not as easy as it appears. The head of the press weighs in at 1800 lbs (calculated weight) and each of the sides is about 1300 lbs (calculated weight). There are 1.5" studs with 2-3/8" nuts holding all this together. I just don't currently have anything that can handle that kind of weight and size.
So, I'm hawking Craigslist looking for a decent deal on a forklift to buy so that I can take this thing apart. Anyway, here (again) is the base of the press that needs to have the machining done to it. It is the inside wall that is just inside of the ring of bolt holes that needs the repairs to it:
In the meanwhile, I'll continue to work on other Prowler projects like finishing Kit #18. More to follow on this project.
2. Making Parts For Ernest - As you might recall, earlier this year George sold his 3rd Prowler to Ernest. On his initial flight, Ernest suffered a hydraulic failure and had to land the airplane with the gear up. The airplane was insured and by June the insurance company settled with Ernest and he was ready to get to work repairing the airplane. He asked me to help him with the parts needed to complete the repairs. Of course, I was more than happy to help support him in any way that I could. We decided that he would need the inboard walls of each radiator, the inboard fairing of each radiator, the lower radiator skins, and the inboard radiator channels for each radiator. Then, he also needed the inboard flap rib for each inboard flap section, and the skin for each inboard flap. And, lastly he needed a new rudder bottom cap (skin).
After reviewing all of these parts, I decided that I could make all of them, with one exception. The rudder bottom cap is a complex part to form. It's complex because it is formed, curved and tapered in multiple dimensions. I was going to need help from the master! I called George to see if he would come and help me in the shop for a day. He agreed and was happy to have a small Prowler related project to tackle. At 87 years old, he's still going strong! Here is George working on forming a radiator side wall:
Here is the rudder bottom cap that George formed up for Ernest. In the foreground is the flat pattern. Behind is the finished product. Making this part is more art than science. George formed this using just a piece of radius-ed 3/8" flat bar anchored to the welding table, a shrinker and a hammer!
Here is the rest of the parts that we fabricated for Ernest that day:
The next day, I cut and formed the skins for the inboard flaps and fabricated the inboard flap ribs for the inboard flap sections:
Then, I packaged them all up and got them to FedEx:
I just talked with Ernest today and he reports that the has the radiator work nearly complete. He has gotten new radiators fabricated for the plane by a local race shop. Now, he just wants to re-plumb the coolant lines from the engine compartment to the radiators with newer, better lines than the plane currently has. Once that is done, the radiators will be complete.
The flaps have also had the inboard ribs replaced and been re-skinned. Now they are waiting on paint. He has torn the PSRU completely down and had all the components check for any damage. Nothing was found and he has just completed re-assembling the PSRU. Now, it needs to be put back on the airplane.
So, he is making great progress on the airplane repairs and has a goal to have the repairs completed and the airplane ready to be tested by Christmas. Great job, EZ!! BTW - He promises to send pictures soon and I will include them in the next update.
3. Making Parts For Kit #18 - All summer long, I was only getting home for a few days at a time. Since that was not a long enough time to tackle any large projects, it was long enough to work on a few parts for Kit #18 during each block of days off. Here are a few pics of some of the MLG wheel well parts:
Here is one of the radiator lower skins with the intake fold-over that forms the lip for the inlet air:
By now, I've made almost all of the aluminum parts and I am getting started on the remaining steel parts and steel assemblies.
The next item on the list was the flap actuator that mounts on the forward side of the rear spar under the cockpit floor. I fabricated all the steel parts and then realized that all these parts have to be held in the correct positions while the assembly is being welded.
If I did get a welding jig for this assembly from George, I have never been able to figure out what it was. So, I dug around the shop and found the needed materials and then welded up my own fixture. This holds all the parts in the correct orientation while they are being welded together. Here is all the parts for one flap actuator installed in the welding jig. A printed page with the relevant dimensions is in the foreground:
Then, I made up two sets of parts to take to my TIG welder:
This is one of the actuating arms on the flap actuator assembly:
I have to make several of these for each airplane in both the long form and the short form. The same arm is also used on the flap actuating arm that is attached to each inboard flap spar. So, I needed to find a way to make these quickly and practically and have them come out the same each time.
I started by finding a 5/8" piece of steel plate to put an appropriate radius on two edges. This will be the punch die I'll use to form the parts around, like this:
Next, I found a good sturdy piece of plate steel to made a base for this forming press:
Then, I found a couple of suitable pieces of heavy square steel tubing with radius-ed corners:
The die will be "motivated" by the plunger in my 20 ton Harbor Freight H-frame shop press. So, it will need some guides to keep it straight and aligned during the initial stage of forming. To do this I fabricated two pins from 1/2" bolts and placed them in the correct locations into the base and welded them from the bottom of the base. Next, I fabricated two steel tubing sleeves and welded them (one on each end) to the punch die. This creates the bulk of the pressing die that will help me make these U shaped arm parts:
This is the flat pattern for this part. The first step to making this part is to cut out the blank and cut the two locating holes:
Then, I bend up each side of the U shaped arm to 45 degrees (or so). This helps the placement of the part in the bending die that I fabricated (above). Here is the bending of one of the flanges of an arm part in the sheet metal brake:
Then, I place the part into the forming die and place it in the 20 ton press. Run the die down into the part and this is the result:
Pop the forming die out of the press and pull out the formed actuating arm. Perfect, every time:
Here is the forming die and several of the arms I formed for the two flap actuators:
One more piece of the Prowler production puzzle is solved!
4. Visit From Bryan - In June, Bryan and his wife were touring the country visiting their kids and grand-kids. The Prowler shop was along the route between two of their children's families and one good family friend. So, we were thrilled to host them for a few days. Actually, all we had to do was provide a flat spot of driveway and an electrical hookup for the RV.
We had a great couple of days messing around in the shop and working through several Prowler production problems and ideas. Here's a pic of us checking out the engine compartment mock-up that I made several years ago:
One of the little projects we accomplished was to remove a section of the side of the aft fuselage from Chuck Westcott's airplane. I got that part of Chuck's plane when I went down and purchased all the Prowler related items from Mike Dodd's son a few years ago (Mike and Chuck were very good friends). Anyway, Bryan suggested that we cut out the aircraft registration number from the aft section of Chuck's aircraft tail and make a kind-of memorial for Chuck. Then, we added a phrase that Chuck had coined and has sort of become an inside joke between us. We ended up with this:
I've got it hanging on a wall in the shop. This was a fun project and a fitting tribute to Chuck. Thanks, Bryan. We totally enjoyed your visit and look forward to the next time. If anyone else is ever in the RDD area of northern California, please let me know. You're always welcome to stop in. The only challenge will be my work sked.....but, I'll do my best to try to be available.
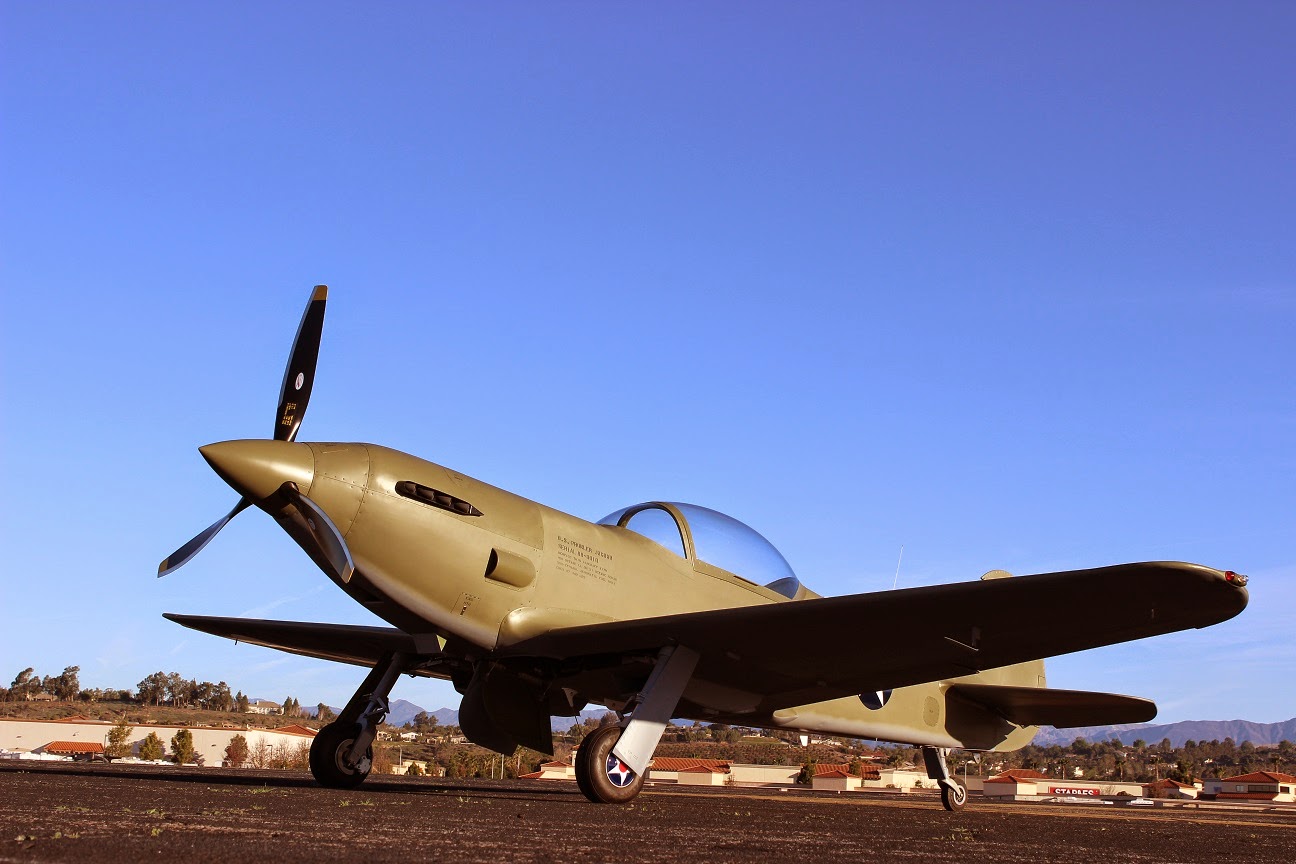
5. Visit To See Ray - In August I was "on call" at work again for the month. I had some things that I needed to take to Ray and he had some things to show me on the airplane. So, I found a good couple of days where things were slow at the day job and headed up to the Camarillo airport to meet Ray.
He's been finishing up some other projects (RV steering repairs and an awesome El Camino restoration), so he hasn't had a lot of time available for the airplane lately. Here are a few current pics of the airplane in his hangar:
We pulled the panels off of the engine compartment so that we could trace the oil line plumbing for a mod that Ray did to take extra lubrication oil up to the bull gear area of the PSRU. Ernest asked for info on this mod so that he can do the same thing to his airplane while he has it apart for repairs. This allowed me to get some pics to send to Ernest.
Sure is a well designed lay-out and an "organized chaos" of systems tucked under that hood! Beautiful work, Ray!
While working on the other projects, he did manage to design a new spring return system to hold his tailwheel door closed. Essentially, the extension of the tailwheel strut causes a roller on the strut to push the door open against spring pressure. When the tailwheel retracts, the spring pulls the door back closed behind the strut.
It was tough to get a good pic of the system, but here is the best I got. There is a cable mounted directly to the bulkhead just behind the cable clamp in the pic below. The cable goes up and around the pulley in the pic. The pulley is attached to a spring. The other end of the spring is attached to a forward bulkhead. After looping the pulley, the cable goes into a cable guide tubing that takes the tension down to the tailwheel door:
Here you can see the cable guide take the cable thru the bulkhead formers and then turn downward just behind the over-center lock spring:
The far end of the tension cables are attached to the tailwheel door below at the locations below. You can also see the roller that Ray mounted to his strut to activate the door:
Ray has been also working out a few fuel system bugs and is about to begin a series of engine runs and taxi tests, soon. Once those are complete, he will set up a flight testing schedule. But, in the meantime, he has to start logging some taildragger time. More to come. You can be sure that I will be on hand for his first flight if I am at all able to work it out!
6. Updates From Francis - Here are a few of the latest pictures from Francis and Robert on their Prowler build. The white tent structure was what they used over the winter to hold the heat in inside the area where they were working on the wing in the jig:
A closer view:
They have begun to temporarily place and clamp the nose ribs and some of the mid ribs in preparation for final assembly:
Here they are working on the rib flanges at the junction between the outboard and inboard main spar sections:
In just a little more than a year, these guys have caught up and gone way past me on where they are in constructing their kit. This is really impressive progress. In an email exchange with Francis a while back I was lamenting that they are going much faster with their build than I am. Francis' reply was a French saying: "The town cobbler is the worst shod!" I guess I resemble that statement. Another view of their main spar junction:
I recently got an email from Francis that he'd spent some of his summer visiting family and friends. Now, he's back on the Prowler project and emailed me with questions about a few of his mid ribs. So, we should see more progress from Francis and Robert in the coming months. Nice work fellas! You are doing a fantastic job! Stay tuned for more progress!
NON-PROWLER ITEMS:
7. AirVenture 2015 - Once again this year, Airventure was impressive! By all accounts, it was a great show with all the numbers that EAA tracks showing good gains this year. Here's a few of my pics. This year there were 5 Corsairs on the warbird ramp together all at the same time. That's about 3 more than a normal year. This is my personal favorite warbird, ever. Here you can see 4 of them in this panorama shot:
The other one was directly behind me and too far to get in the same photo. Here it is from a different location with my sister, her two boys and Bryan in the pic:
One of the new F4-Us this year was from the
Cavanaugh Flight Museum based at KADS in Addison, TX. That is where I did most of my primary flight training and flight instructing in the mid 1990's. We (students and instructors) used to walk over to the museum and check out the airplanes on days when there wasn't a lot of flying going on. You might recall that Cavanaugh's previous F4-U was the one that ended up in a fatal crash with a Bearcat on takeoff several years ago at AirVenture. Their new Corsair is just as impressive as the old one!
As I recall, that aircraft hull was a total loss, so I don't think that aircraft was restored, but I could be mistaken....not sure.
If you are ever in the Dallas area and have a few hours to spare, I highly recommend a trip the
Cavanaugh Flight Museum. It is well worth the trip. It is the cleanest museum, or display of aircraft, that I have ever experienced (except maybe for Paul Allen's collection on Paine Field north of Seattle. That collection is smaller, but equally impressive!).
The BUF was at KOSH this year. This is the 1st time that I've every gotten up close to a B-52. What an impressively large aircraft!
It has had an amazingly long time in service with production ceasing in 1960's. And, the BUF is slated to remain in service until 2040!!! That will mean that some of these aircraft will have been in service for 90+ years!! Unbelievable!!
Here's another favorite of mine, the Beech Starship. It never gained a lot of traction as a business aircraft mainstay. But, the technologies developed to produce these aircraft are now used in the production of nearly every composite aircraft (thanks to Burt Rutan and his companies RAF and Scaled Composites):
It's appearance is unmistakable from any other aircraft.
This next airplane has an interesting history. Not so much with regard to the aircraft itself, but with the builder. This full-scale replica of a Supermarine Spitfire was built by a gentleman named Bob DeFord. That Prowler Guy should get outta the way - he's blocking the view of an awesome airplane:
It's a beautiful aircraft and he did an amazing job with it. But, the most interesting part is that Bob was the original owner of Prowler Kit# 007. Bob ended up selling that kit to a fella named Curt Hughes. Here's the instrument panel:
Curt, in turn, sold that Prowler kit to......our very own Bryan Davies. And, now you know the rest of the story!
The Lancaster is always impressive:
This is a Radial Rocket of 7-8 years ago. Only, it's had the radial removed and an LS V-8 engine installed on it:
Once again, the night airshow and the fireworks that follow were a real crowd pleaser:
Last year, the volunteers that work in the composites workshops at EAA got frustrated with the amount of space and the time that they were allocated for doing their demonstrations. They wanted to be able to demonstrate the vacuum infusion of a complete fuselage skins for all the builders interested in building with composites.
Well, for this year, they teamed up with the vendors of the composite products (fibers, resins, etc.) and they approached the president of the Replica Fighter's Assoc. about using their facility to be able to demonstrate these techniques. Well, it just so happens that the RFA prez is Tony Pileggi. Tony owns the
Corsair82 project and has developed outstanding molds for his Corsair82 airframe and skins. (Tony's whole Corsair82 project is incredible - he's done an amazing amount of research and work.) Anyway, the deal was struck and here is the crew removing a cured fuselage skin from the bottom half mold:
And, here it is with everyone gathered around that was involved in making this mutually beneficial project happen (Tony is in khaki in the center):
It looks great and was a very good series of demonstrations!
And, finally - the most popular T-shirt seen on the EAA grounds this year:
Cute!
8. Backup Diesel Generator Shed - Late last year I got started on building a small shed building to house my backup diesel generator and maybe, eventually, my air compressor. On the last blog update I had gotten the main portion of the building done (slab, walls, roof, siding, etc.). But, I still had the main door with just a big opening and nothing done on the inside.
Since the last post I have finished sheathing the inside of the building. I wanted it to be as sound absorbing as possible so I decided to try using the insulation installed backwards with the pink showing on the inside. Then, I used pegboard (that I found on Craigslist that was pretty inexpensive) as the interior sheathing. You can see the setup installed here on the first wall:
Then, I continued with furring strips on the ceiling:
And, then the insulation and pegboard on the ceiling:
The gap in the top is to allow air circulation out through the ceiling and into the attic area. When the engine is running inside the building, the radiator fan will draw in outside air into a duct and across the radiator. Then it will push the air over the engine for external cooling. Then this air will flow up and out the vent area in the ceiling and out of the ridge vents in the roof.
The exhaust will be piped out through the east wall of the shed and vent directly outside. No exhaust in the attic....bad idea! Anyway here are lights installed:
Now, when you walk inside, you can really notice the drop in background noise! It really does a good job of absorbing sound from the outside getting in. Time will tell if it also works for inside noise tryint to get out. With the building now ready to get the genset, my shop was ready to get more room! Here I am dragging the genset out of the shop with the tractor. The genset is mounted on steel frame with skids on the bottom:
I got it lined up with the opening in the building and then pushed it in with the bucket:
A closer view:
Here is the genset positioned in the new building:
Here is the beginning of framing in the doors to the main opening. I wanted to have a service door for the normal entrance to the shed and, also, have the ability to open the whole end of the building for moving things in and out - if need be. So, here is the service door standing roughly where it would eventually be installed:
Then, I framed up two doors, one built around the service door and one to fill in the remainder of the main opening. Once both halves were installed, the building looks like this:
To get the water shed around the building correct, I had to add a small retaining wall and level things with some dirt. The end result came out looking nice:
The most recent addition to the Gen Shed is a bit of a gravel path leading off of the driveway up to the door opening. With the rainy season coming, I had to get this done or I'd end up with muddy shoes every time I needed to get into the shed:
The plywood leaning up against the walls are to shed any rain that might sneak up on me this fall before I get the siding painted. This siding has to have paint before it gets wet, or it will ruin the siding.
So, the punch list for this project is still pretty long and includes: all the electrical switching and wiring hook-ups for the generator, painting the exterior siding, adding the trim pieces on all the corners and putting trim boards around all the door gaps (and, maybe gutters - if I am in the mood.)
9. Family Ride in the EAA Ford Tri-Motor in RDD - In late May, EAA had the Ford Tri-Motor in town giving rides (for a fee). The revenue from these rides helps support the greater EAA efforts. I decided to buy the entire family a ride. Here's the Tri-Motor getting fueled:
My oldest daughter got the "good seat":
Here's a selfie of my youngest and I up front with mom and middle daughter waayyyy in the back:
It was about a 20 minute flight and the pilot took us up to downtown Redding and around the Sundial Bridge over the Sacramento River:
Here's the post-flight photo:
It was a great experience, a good family outing and it helps out EAA.
10. A Fun New Project - OK. So, I'm getting old(er) and that walk down to the shed to get the tractor seems to be getting longer and longer. I've been thinking about getting something to run around the property with and maybe use to run to get the mail, or chase down the dog, etc. After hawking Craigslist for a while I came across an ad for a gas golf cart "project" with a cheap price tag. It was basically a basket-case, but it seemed like it was mostly there. I took a gamble and became the owner of a 1991 Yamaha G8 gas powered golf cart. Initially, I just kept finding more and more things on it that needed fixing and began to get buyer's remorse. Here it is up on jack stands:

But, over the course of a few days, as I got into the project, I started to make some headway. The wiring was a mess. I spent one whole day just fixing years of someone's bad wiring hack jobs. Eventually, I got the electrical system working the way that it should and got the cart to start. It also needed all new tires. Here it is with new rubber on the back:
Now, I've been through most of the systems. I've replaced the king pins and bushings on the front steering. I've gotten the seat bottom recovered. The transmission seems to be working and turns over by hand. I have the belt removed in this pic below so that I can run the engine without anything moving:
The engine runs, but back-fires a lot. After researching the back-firing on some internet forums, the general consensus is that the air cleaner has to be installed correctly and there has to be a good seal on everything leading up to the inlet to the carb. Well, mine was missing all that. The hole you see next to the gas tank below is where the air cleaner assembly is supposed to be.
I located an air cleaner online and it has arrived. So, on the next few days off I will install that and see if I can get it running better. Hopefully, I'll get it rolling under it's own power soon. If so, it might just become a Craigslist "good deal". I'll let you know how it goes in a later post.
11. Of Course, More Retaining Wall Work - With winter and the rainy season on the way, I am forcing myself to make one last push to get the big retaining wall done this fall. To be honest, I'm completely sick of this project, but I need to get it finished. If I do, then the dirt will settle this winter with the rain. Then, in the spring I can fill in any areas that will have sunk and by next fall the wall and the path above will be done. Here is another big section completed:
And, after a couple more 1/2 days of work, here is the wall getting close to the end. The lower course of the wall in the picture is almost to the stopping point. I just need a bit more dirt and I will have the upper half of the next "chunk" of the wall done. This wall starts at the road (far end of the picture below) and makes it's way about 300 feet up to the corner of the house.
The main reasons for the wall were to add space in front of my shop for getting in and out of the overhead doors and also to add more "flat land" around the front yard area. It's also needed so that the LP gas guy and the septic pumping guys can get the trucks closer to the back yard where both of those "tanks" are located. Anyway, I'm getting close. Hopefully in the next update I can report that I am permanently finished building retaining wall. Say it isn't so!!!
That's all the news that's fit to print from the Prowler shop. Thanks for stopping by to check on the progress. I hope everyone had a great summer and is enjoying the fall season. See ya next time.