Hello again. Thanks for checking back in on us. In this update we tell you about:
1. A builder visit to Steven Rogers
2. Chuck's airplane had a second round of test flights
3. Prowler Kit #11 Lands in France
4. A quick trip to Sun-n-Fun
5. Prowler Plasma system finally makes FIRE!
1. Builder Visit to Seattle
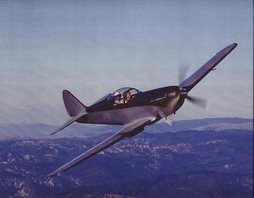
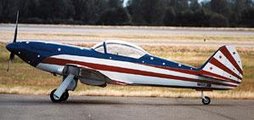
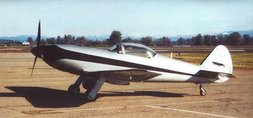
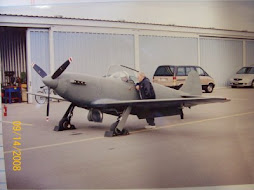
Todd had a long stay in Seattle recently and had an opportunity to get together with Steven Rogers and his aircraft. His aircraft was build from George's kit #14 by him, his father, and (on several occasions) George too. It was a great visit and we learned a lot about the airplane from Steve's experiences so far in his initial flying and testing. Unfortunately, he recently had a hydraulic issue and the tailwheel collapsed while taxiing and landed on the rudder. So Steve is in the process of making the necessary repairs and we'll have more pictures of the airplane from a follow-on visit. Steve's airplane was the 4th Prowler that we know of to fly and wish him well getting his repairs done soon so that he can start to enjoy his bird instead of work on it. Here is one picture of a mod that Steve did to his Prowler that has dramatically helped to improve airflow through the engine compartment. Thanks for the Visit Steve.
2. Chuck's 2nd Round of Test Flight
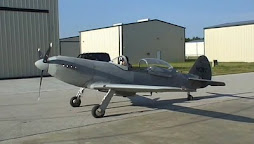
We got news of Chuck Westcott's second round of test flights via Ray Siem. The flight's were successful, however, Chuck still reports having water cooling problems. He is in the process investigating the problem and we'll try to have more details in the next update.
3. Prowler Kit #11 Lands in France.
Nicolas Hombreux reports that the shipper has delivered his kit. He has begun un-crating, inventorying and organizing his parts. Here are a few pix:
 He promises to have more pix of him with the kit for the next update. Congratulations Nicolas! We look forward to helping you get your airplane built in the years to come.
4. Sun-n-Fun
A recent pop-up trip allowed Todd and Dave to get together for a quick Prowler Shareholder's meeting at Sun-n-Fun. Dave flew his certified aircraft into LAL for the annual get-together and we got to spend some time checking out potential suppliers and vendors. We are fairly interested in a FWF package that is being offered by Geared Drives out of Conroe, TX. Bud Warren has designed a very nice self contained PSRU that is designed to work with any SBC engine, is very solid and is virtually plug-n-play. He is marketing a FWF package for the RV-10 buyers that we think is very strong. Check it out here: Geared Drives We are giving this some strong consideration for the Prowler - if we can make it fit. Time will tell.
5. Prowler Plasma Makes Fire!
After months of research, lots of money and lot of modifications the Prowler Plasma system finally fired for the first time. The latest accomplishments include: troubleshooting the installation of Mach3 into the computer; unlocking the secrets of remotely triggering the Powermax1000; and learning the correct order in which the consumables are attached to the machine torch. With all that done - the machine finally moved and fired under it's own power and we are pleased with the results.
 Most recently we "tuned" the motors and checked the system for accuracy on each of the X, Y & Z axes. With just a little tweaking the X axis moved exactly 80 inches when we told Mach3 to move the X axis 80 inches. Should be good for making spar caps and other long pieces.
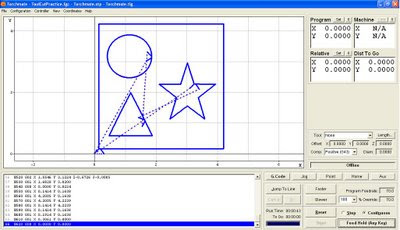
Now the real learning starts. Figuring out all the software that will eventually allow us to make parts with the plasma setup. It looks like we will be designing (modeling - actually) our parts using the new BobCAD-CAM-ART version 23. Then those files will be fed into SheetCAM TNG to create the actual tool paths and make the G-code to prepare the file for the plasma setup. Then those get sent into Mach3 which will actually cut out the parts. Easy right?!?! That's 4 major, new, unfamiliar pieces of software to learn if you include G-code itself. Despite that we've figure out a few things already. Here's a line drawing made from a "vectorized" copy of our "raster" style Prowler Logo: And this is the first Prowler Sample Part - it's nothing really. Just something made up to learn how to use BobCAD, SheetCAM and see if we can get it to move the table with Mach3:
 We will find out if the machine moves correctly the next time we're in the shop. More later.
That's all for this update. We'll post again in a few weeks. Thanks for stopping by.
1. A builder visit to Steven Rogers
2. Chuck's airplane had a second round of test flights
3. Prowler Kit #11 Lands in France
4. A quick trip to Sun-n-Fun
5. Prowler Plasma system finally makes FIRE!
1. Builder Visit to Seattle
Todd had a long stay in Seattle recently and had an opportunity to get together with Steven Rogers and his aircraft. His aircraft was build from George's kit #14 by him, his father, and (on several occasions) George too. It was a great visit and we learned a lot about the airplane from Steve's experiences so far in his initial flying and testing. Unfortunately, he recently had a hydraulic issue and the tailwheel collapsed while taxiing and landed on the rudder. So Steve is in the process of making the necessary repairs and we'll have more pictures of the airplane from a follow-on visit. Steve's airplane was the 4th Prowler that we know of to fly and wish him well getting his repairs done soon so that he can start to enjoy his bird instead of work on it. Here is one picture of a mod that Steve did to his Prowler that has dramatically helped to improve airflow through the engine compartment.
Thanks for the Visit Steve.2. Chuck's 2nd Round of Test Flight
We got news of Chuck Westcott's second round of test flights via Ray Siem. The flight's were successful, however, Chuck still reports having water cooling problems. He is in the process investigating the problem and we'll try to have more details in the next update.
3. Prowler Kit #11 Lands in France.
Nicolas Hombreux reports that the shipper has delivered his kit. He has begun un-crating, inventorying and organizing his parts. Here are a few pix:
He promises to have more pix of him with the kit for the next update. Congratulations Nicolas! We look forward to helping you get your airplane built in the years to come.4. Sun-n-Fun
A recent pop-up trip allowed Todd and Dave to get together for a quick Prowler Shareholder's meeting at Sun-n-Fun. Dave flew his certified aircraft into LAL for the annual get-together and we got to spend some time checking out potential suppliers and vendors. We are fairly interested in a FWF package that is being offered by Geared Drives out of Conroe, TX. Bud Warren has designed a very nice self contained PSRU that is designed to work with any SBC engine, is very solid and is virtually plug-n-play. He is marketing a FWF package for the RV-10 buyers that we think is very strong. Check it out here: Geared Drives We are giving this some strong consideration for the Prowler - if we can make it fit. Time will tell.
5. Prowler Plasma Makes Fire!
After months of research, lots of money and lot of modifications the Prowler Plasma system finally fired for the first time. The latest accomplishments include: troubleshooting the installation of Mach3 into the computer; unlocking the secrets of remotely triggering the Powermax1000; and learning the correct order in which the consumables are attached to the machine torch. With all that done - the machine finally moved and fired under it's own power and we are pleased with the results.
Most recently we "tuned" the motors and checked the system for accuracy on each of the X, Y & Z axes. With just a little tweaking the X axis moved exactly 80 inches when we told Mach3 to move the X axis 80 inches. Should be good for making spar caps and other long pieces.Now the real learning starts. Figuring out all the software that will eventually allow us to make parts with the plasma setup. It looks like we will be designing (modeling - actually) our parts using the new BobCAD-CAM-ART version 23. Then those files will be fed into SheetCAM TNG to create the actual tool paths and make the G-code to prepare the file for the plasma setup. Then those get sent into Mach3 which will actually cut out the parts. Easy right?!?! That's 4 major, new, unfamiliar pieces of software to learn if you include G-code itself. Despite that we've figure out a few things already. Here's a line drawing made from a "vectorized" copy of our "raster" style Prowler Logo:
And this is the first Prowler Sample Part - it's nothing really. Just something made up to learn how to use BobCAD, SheetCAM and see if we can get it to move the table with Mach3: We will find out if the machine moves correctly the next time we're in the shop. More later.That's all for this update. We'll post again in a few weeks. Thanks for stopping by.


 The hydraulic pump is only good for 1500psi. However, the piston in the ram is 5 inches in diameter and that gives an area of approximately 19.6 square inches. This gives almost 30,000 lbs of pressure from the ram. Spread that force out over an average part area of 300 square inches and it figures out to about 100psi. Should be more than sufficient to fold up some 0.040" type O aluminum. Next comes the learning curve associated with actually pressing out parts. In particular, keeping the male and female dies lined up with the flat blank that will become the part as the press does its thing. More to follow.


 We got the mill moved into position, hooked up with 3 phase power and have even used it already to machine some slotted holes into some brackets for the
 We had a little problem with the delivery of the phase converter panel. Apparently some components shook loose during shipping and managed to beat-up the rest of the components in the panel along the way. Here's what it looked like at delivery:
 Not wanting to wait the time that would be necessary to return it and wait for a new delivery, we set out to put the pieces back together. With the help of screws, glues and bailing wire we got it put back together and installed. It turned out well. Total cost for the phase converter was ~ $200. Here's a shot of the final rotary phase converter install:
 Here's the mill pretty much ready to go:

 This box also, however, requires the use of a new software control system to control the table motion. You can check out the box details here:
 We also installed the digital torch height control system, but so far the test has been unsuccessful. Didn't have time to troubleshoot further before having to head off to the day job for the week. More to follow. We also made several "tweaks" to the
 re-mounting the X axis motor and shafting,
 re-meshing the X axis rack and pinion gearing,
 and adding more Y axis cam followers to support the new floating torch holder. Here's the slotted bracket mods to the Y axis carriage plate for the cam followers to be added to.
 All these mods have greatly increased the rigidity of the


 Now we just need to purchase some new tips and consumables for the machine torch. Hypertherm is making a new line of consumables that they call their "Thin Cut" tips. They have been having good success with these tips and they have apparently been getting good reviews from customers. More on that when we get the machine cutting some metal.
 In addition to this setup, we spent a day plumbing compressed air to the other side of the shop to supply the air to this cart. Another day was spent running an 8 gauge 40 amp electrical circuit over to the other side of the shop to supply power to the plasma torch.
 3. Floating Torch Holder - In preparation for adding the automatic torch height control, we need to have a floating torch holder. These are for sale online, but some cost as much as $1700. Using ideas gathered from several designs found online, we put together our own torch holder. Here are some pics of the assembly.


 Just before leaving for work this last time the UPS truck delivered the leadscrew and stepper motor that will do the Z axis movement. Here's a rough idea of how the leadscrew will be placed into the unit:
 Once we finish the torch holder the next step will be to purchase the auto height control electronics and software and convert our TM1 table to a Mach3 table. We'll still use the TM motor control box, but it will now be controlled by the Mach3 software. This setup will give us true, digital, full 3D toolcut path capability (and arc voltage height control). More to follow on this.

 Overall, it seems that the mill is in great condition for the price - with just a few minor repairs (and a good cleaning) needed. So far we've spent a day cleaning the lower part of the mill, lubricating the ways, and getting the DRO (digital read out) to work. The DRO sensors were very dirty and needed alignment, but now work great. This tool will be invaluable in producing parts for our first aircraft and is a necessity for making the accessory gear drive and PSRU parts for the engine. More to follow.


 Great work Bud! We also got Bud hooked up with our Yahoo Prowlerbuildersgroup and look forward to learning a lot from him on building the Prowler. Congrats Bud and we are all looking forward to your first flight. Thanks for joining the group.

 See Rick's website link (on the right side bar) for more information. We look forward to working with you and assisting you in getting your aircraft back together and kit built. We will post more about his plans once he gets his inventory done and has had an opportunity to come up with a game plan. Welcome aboard Rick.
 Cable guides are now installed and table tested. No more wires hanging off the ceiling!! The torch holder system mod is up next. Here's the "manual" torch holder before removal:
 We are investigating modifying this to a "machine" torch holder that will also be able to be used with the torch height control system. More to follow. Here's a pic of the current setup:

 We found a day we both had some time and I went to visit him. We spent the better part of a day trying to flatten the "learning curve" on using his setup. The parts are still being worked on, but after seeing his machine work I realized that this is the way to go - when it comes to producing Prowler parts.


 The table came with the computer setup, but has had the hard drive reformated and a new operating system installed. The monitor has been replaced with an LCD monitor. We still have a lot more work to do before this becomes a useful tool in the Prowler shop. First off, we still have to purchase a plasma torch for it. I have been trying to learn how to use the software and I'm having some modest success. I have modeled my own "sample" part using the Torchmate CAD software. I have exported this file from the CAD software as a .dxf and then imported it into the Torchmate software that actually runs the machine. This software converts the "sample" part .dxf file into something called "G-code" which is what actaully makes the table move in the correct way to cut the part.

 When we get ready to make another airframe, it should simply be a matter of putting the metal in the machine, pull up the files, and hit enter. Without having done any in-depth research, the hope is that we (using our system and Cabi's system) will be able to satisfy our production requirements - when we get to the point where we can start selling airframes.