1. CNC Jigs
2. Tailwheel Strut Fabrication
3. Airplane CAD Work
4. A Free 8 Foot Sheetmetal Brake
5. More Tools
6. Cabi Saves Kit #9 from the recycling SCRAP HEAP!!!
7. Bud's Airplane (Kit #16) Attempted First Engine Start
8. Chuck's Airplane (Kit #12) FLIES AGAIN
9. Ray's Airplane (Kit #10)
Here's the Latest:
1. CNC Jigs - We recently had to fabricate jigs for 2 parts that we have in the CNC process. To make production as simple, pratical, and repeatable as possible you have to find a way to hold the stock rigidly while the machine does it's thing. You also have to find a way to hold the stock without machine hitting something that it's not supposed to. So far we made jigs for the steel wing plates and the TW strut.

.jpg)
2. Tailwheel Strut Fabrication - is nearly complete. Bryan has asked to have a TW strut fabricated. His kit never had one and he's going to begin the fuselage soon and wanted to start lining up all the parts. So, as we've shown in previous posts, we did the CAD work for the TW strut and got the machining done. One of the steps in the process was CNC shown above (jigs). The bushing holes still need to be reamed and the bushing pressed into them - but the processes are now in place to make these parts in the future.
.jpg)
.jpg)
.jpg)

3. Airplane CAD Work - We've been working diligently on the CAD work for the airplane. We've finished the drawings for the Vert Stab, Horz Stab, Rudder, Elevator, Main Wing Spar, Outboard Wing Spars, Rear Spars, Torque Boxes. The measurements have been done for all of the Center Wing Framing Components and the Outboard Wing Framing Components. When the drawings are completed for these last two sections, we will have completed a CAD drawing for roughly 1/2 the airframe components. The next step in process will be to go back and assemble the individual components into sub-assemblies where appropriate.
4. A Free 8 Foot Sheetmetal Brake (Sort-of) - We got a line on an 8 foot sheetmetal brake that a gent in SoCal was giving away to a good home. It's not a complete sheetmetal brake, however, and needs a lot of TLC. The base of the brake and the bending fence are are what we've gotten, but it's missing the top parts that clamp the material while bending. With a bit of elbow grease and fabrication of some parts, it will become a servicable unit - for a lot less than purchasing one. So far we've taken possesion of the brake, transported it to the shop, taken it completely apart, stripped and sand-blasted all of the parts and then painted everything. The next time in the shop we'll get pieces all re-assembled and get a start of fabricating parts to build the top, clamping part of the brake. Here are pics of what it looked like on arrival:

.jpg) Started the tear apart, cleaning, sandblasting and fixing:
Started the tear apart, cleaning, sandblasting and fixing:.jpg)
.jpg)
.jpg) Sandblasting (effective but VERY tedious and messy!):
Sandblasting (effective but VERY tedious and messy!):.jpg) Painted Pieces ready to go back together:
Painted Pieces ready to go back together:.jpg)
.jpg)
.jpg)
5. More Tools - We ended up picking up a few more tools from the gent that gave us the sheet metal brake. One of the tools is a Tooling Cutter/Grinder. It's a machine to make precise angles to make and/or sharpen toolings for mills, lathes, etc. It was a good deal and it will be nice to have the capability. Here's a pic:
.jpg) Clean up and restoration of this tool is on the back burner for now. At least until we need to sharpen some tooling.
Clean up and restoration of this tool is on the back burner for now. At least until we need to sharpen some tooling.The other item we got was a 30" combination shear, press brake and sliproll. Here it is before cleaning:
 It was a great deal because it has one broken arm.
 .jpg) Here it is after cleaning:
Here it is after cleaning:.jpg) Here's the CAD drawing for the Prowler Plasma to cut out a new arm.
Here's the CAD drawing for the Prowler Plasma to cut out a new arm.  We should have it fixed up in no time. More later. One of the great things of building this company slowly is that we have the time to find these "diamonds in the rough" and polish them up. It saves a lot of $$$ - but it does take time. Since we are not in any huge hurry, we can use this process to position the company for financial soundness.
6. Cabi Saves Kit #9 from the recycling SCRAP HEAP!!! - Late last year Cabi completed tracking down the old Prowler Aviation's Kit#9. The kit had changed hands a few times after it had been purchased from George. Somehow Cabi tracked it to a local college that it had been donated to. It languished there for years and ended up stored in an old CONEX box container. The college was very close to selling it for the scrap aluminum value. Cabi got the kit for value of the scrap metal. What a deal! Nice work John. Here are some pix:


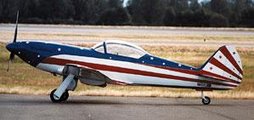
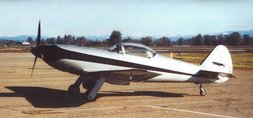
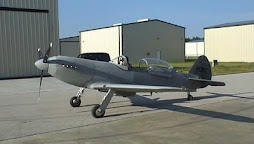
7. Bud's Airplane (Kit #16) Attempted First Engine Start - Got an email from Bud recently and he reported that he's attempted the first run-ups of his airplane. The engine didn't fire and after some investigation he found out that many of the silver solder joints on the fuel injection manifold had somehow become (essentially) closed off. So, he is in the process of making this right and we expect to hear good news from him soon. Here's a file pic of Bud's airplane from a visit last fall.

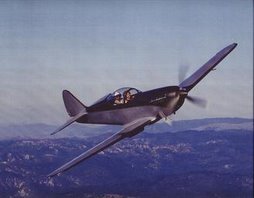
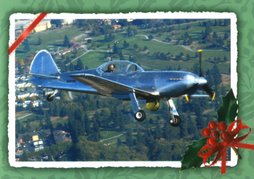
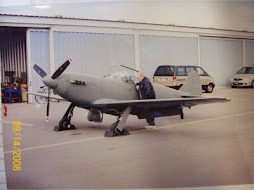
8. Chuck's Airplane (Kit #12) FLIES AGAIN - Last year Chuck was having engine troubles. The engine wasn't running real well, there were engine oil and water cooling issues - among other things. Chuck found a sharp fellow to help him tear the engine apart and find out what was going on. What they found was that one of the distributors was damaged and the engine appeared to be running in a severly "advanced" ignition timing condtion. This had badly damaged one pistion and somewhat damaged others. After many months of rebuilding, the airplane flew again in Jan. Chuck reports that the airplane flew well, the gear cycled well but the engine was not producing "linear" power. The engine ran great and "pulled like hell" at takeoff power, but as soon and the power was reduced, the engine power got "mushy" and difficult to control. He and his technician decided that there were some tuning issues between the mechanical fuel injection system, the supercharger system and the engine. They decided to remove the supercharger system from the airplane. After that, the engine ran great, the power was very controllable, and the airplane performed very, very well. Here's a pic of Chuck and his plane from a builder visit in 2008.
 In a later flight, the test pilot reported that the only remaining "gripe" was that at about 175 mph he ran out of elevator trim. So they will be focusing on getting the Horz Stab incidence set correctly in the near future. After that, Chuck says he will pay his pilot to fly off the 40 hours required to get the Experimental Certificate and then he will be putting the airplane up for sale. Stand by for more.
9. Ray's Airplane (Kit #10) - Is almost ready to get an engine - Ray reports being very close to completing the avionics installations in his airplane. He wants to get most of the wiring completed and get the avionics mostly complete before moving on to the engine and firewall forward. His goal is to get a good start on the engine mount and the the engine installed this year. Here is the most current pic we have of his instrument panel.
.JPG)
That's all for this update. More when additional info and time will allow. Thanks for stopping by.


.JPG)