Well, COVID happened!!!
I cannot imagine that there is a person alive in this country, at least not anyone with any cognitive skills at all, that hasn't heard about the Covid (aka: Corona Virus, Covid-19, China Virus, etc.) I also cannot imagine that there is anyone in this country (probably the world) that hasn't been affected by it in some way or other.
So, before I go any further let me say that if you have lost anyone close to you because of this virus, please accept my condolences, and condolences from my family and our Prowler family. We are very sorry for your loss. There is no dispute that what this virus does, in the worst case, is tragic and very sad.
Next, I will tell you that, so far, my immediate and extended family have been very, very fortunate with regards to Covid. We all know friends, or friends of family, that have had Covid and/or tested positive - but no one has been lost to this thing. That may change, but for now my family and I are very grateful and thankful for this good furtune.
Unfortunately, I haven't updated the blog for almost a year!! I have no excuses - just been busy. And, honestly, I haven't had a lot of Prowler news to update on, except for Francis. He continues to be the "Energizer Bunny" of the Prowler building world this year. So, most of this update (Prowler Stuff) will be about his progress.
Here is what I have for you in this update:
Prowler Items
1. The French Prowler Progress
2. The Static Display Prowler
3. Ruff Cutting Prowler Part Dies
4. George's Early Prowler Drawings
Non-Prowler Items
5. Oldest Daughter Bought Her 1st House
6. Youngest Daughter Solo Flight, Then Private Pilot
7. New Porch/Deck On The House
8. Trailers, Trailers, Trailers
9. New Wisconsin Property
10. Hardinge CHNC Lathe Progress
If you follow my blog, by now you know that my day job is flying for a major US airline. If you follow any business news then you are probably also aware that every US airline has been all but decimated by this Covid thing. My airline's stats for 3rd quarter 2020 showed revenue (money coming in) that is barely 25% of what it was in 2019. After major changes to the airline in the 2nd and 3rd quarters to try to stem the flow - the company's cash burn is still $6M a day as we start the 4th quarter!! It doesn't take a rocket scientist to see that this is not sustainable for too long. You can move the numbers up and down a bit, but every major airline is in the same state - cash burn is far outpacing revenues right now (and has been since late Feb and March of 2020).
The two greatest costs to every airline are fuel and pilots. Depending on what point you look back in history (depending on the cost of a barrel of oil at that time) pilots and fuel trade places for the top cost at any airline. Currently, Covid has also hit the oil industry and fuel costs right now are fairly low. So, if you're an airline looking to cut cash burn as much as possible and fuel is not on top of the list - well, you know what's next. Except, that hasn't happened to a great degree - yet!! Yes, there are some airlines that have sent out furlough notices as of this date, but not in any numbers that match the loss of revenues (75%). I think this is largely for two reasons: 1) Rebound; and 2) Qualification and Currency. These are actually different topics, but they are closely linked.
Rebound - From the minute the bottom fell out of flying demand in March 2020, the airlines have had their best prognosticators trying to guess when and how demand for flying would return. We've heard about V shaped curves, U shaped curves, W shaped curves, etc., etc. (I personally think it's a check-mark curve [ |/ ] with the very steep drop and wiggly tail to the right that is pretty flat.) But, who knows!?!? The reason this is important is that an airline (as in any business) wants to be there to provide service when there is demand for it, right? So, you don't want to be the "only guy" out there who isn't ready. Ah, but what does it take to be "ready"?
Qualification and Currency - What it takes to be ready is (very simplistically): an airplane, fuel, and a flight/Inflight crew. A lot of airplanes got parked in the desert this year, and it does take a little while and a little work to get them up and running again. But, it is manageable and not a huge cost. You can get fuel with a phone call. But, your flight crew has to be qualified and CURRENT! Depending on the type of training program at an airline, the crew has to pass a checkride every 6, 9 or 12 months to be qualified (this might also include some OE and line checks). And, every pilot must have had 3 takeoffs and landings in the past 90 days to remain current in that type of aircraft. So, if an airline decided to furlough 75% of its pilots (to match the reduction in revenue) and then the passenger demand for flying suddenly returned - you'd be caught without your ability to provide the service until you get your flight crews re-trained and current - and that takes TIME. In some cases, it can take a long time. That's why you haven't see huge numbers of furloughs at the major airlines - yet.
The point of all this is that most airlines have been trying to come up with creative ways to reduce the cost of keeping pilots around as much as possible - but they are bearing the brunt of the cost of NOT doing widespread furloughs. So, now the airline industry is basically in a situation similar (but for much different reasons) to the late 80's and early 90's where airlines are taking on huge debt and "burning the furniture" to try outlive "the other guy" and be one of the few to survive and be able to provide the airline service to customers when demand returns. It's a cut-throat game. But, "to the victor go the spoils." And, the spoils are sizable -just look at Delta's profits in 2019 ($1B each quarter!!!). That's $1B per quarter left over after you've paid all your payroll, bills, taxes, etc.!! Nice work, if you can get it.
The "creative ways" I mentioned above is what has applied to me for most of this year. My airline started to offer what they call a VIL (Voluntary Incentive Line). What that means is you can volunteer (on a monthly basis) to stay home and get paid 2/3 of your monthly guarantee (base pay check). [That equates to roughly 1/2 of a "normal" paycheck, or even less, depending on how much a given pilot chose to work each month during "normal", "non-Covid" times.] Financially, for me, that was enough to stay afloat and tread water for a while - so, sign me up!! Starting in April this year I was basically "off of work" until just recently (Nov) when I had to head back to the schoolhouse and get re-qualified and re-current.
So, what did I do with all this time? Well, unfortunately, not a lot of Prowler related work. I still worked hard, nearly every single day. But, it was a lot of work done to help my kid(s) and to finish some major projects that have been hanging fire around here that are not related to rebuilding Prowler Aviation - as you will see. But, by getting a lot of this stuff off my plate now I'm hoping that when work (the day job) goes back to normal in the future, I'll then have more time to work on Prowler related projects with my days off.
On to the update. First, the Prowler stuff - then, the other stuff:
Prowler Stuff
1. The French Prowler Progress - Francis is currently the "rockstar" of the Prowler building world. He has been making great progress and sending me lots of updates as he does. I really appreciate him sending me updates with lots of pictures that I can share with you all. (Eric in Montreal is the only other currently active builder that I know of, unfortunately I don't know the status of his Prowler project).
Francis started the year finishing his torque boxes. He made the mods to the boxes that Ray designed when he built his torque boxes. Ray added some access ports that he built into the tops of his boxes over the pivot link so that if he ever needed to get in there he would be able. [Turned out, Ray did have a failure in one of torque boxes and he ended up needing to make repairs in each torque box. Good thing he had those acess holes available! I covered this in a previous post, Section 2.C here.] Anyway, Francis liked this idea and did the same with his torque boxes:

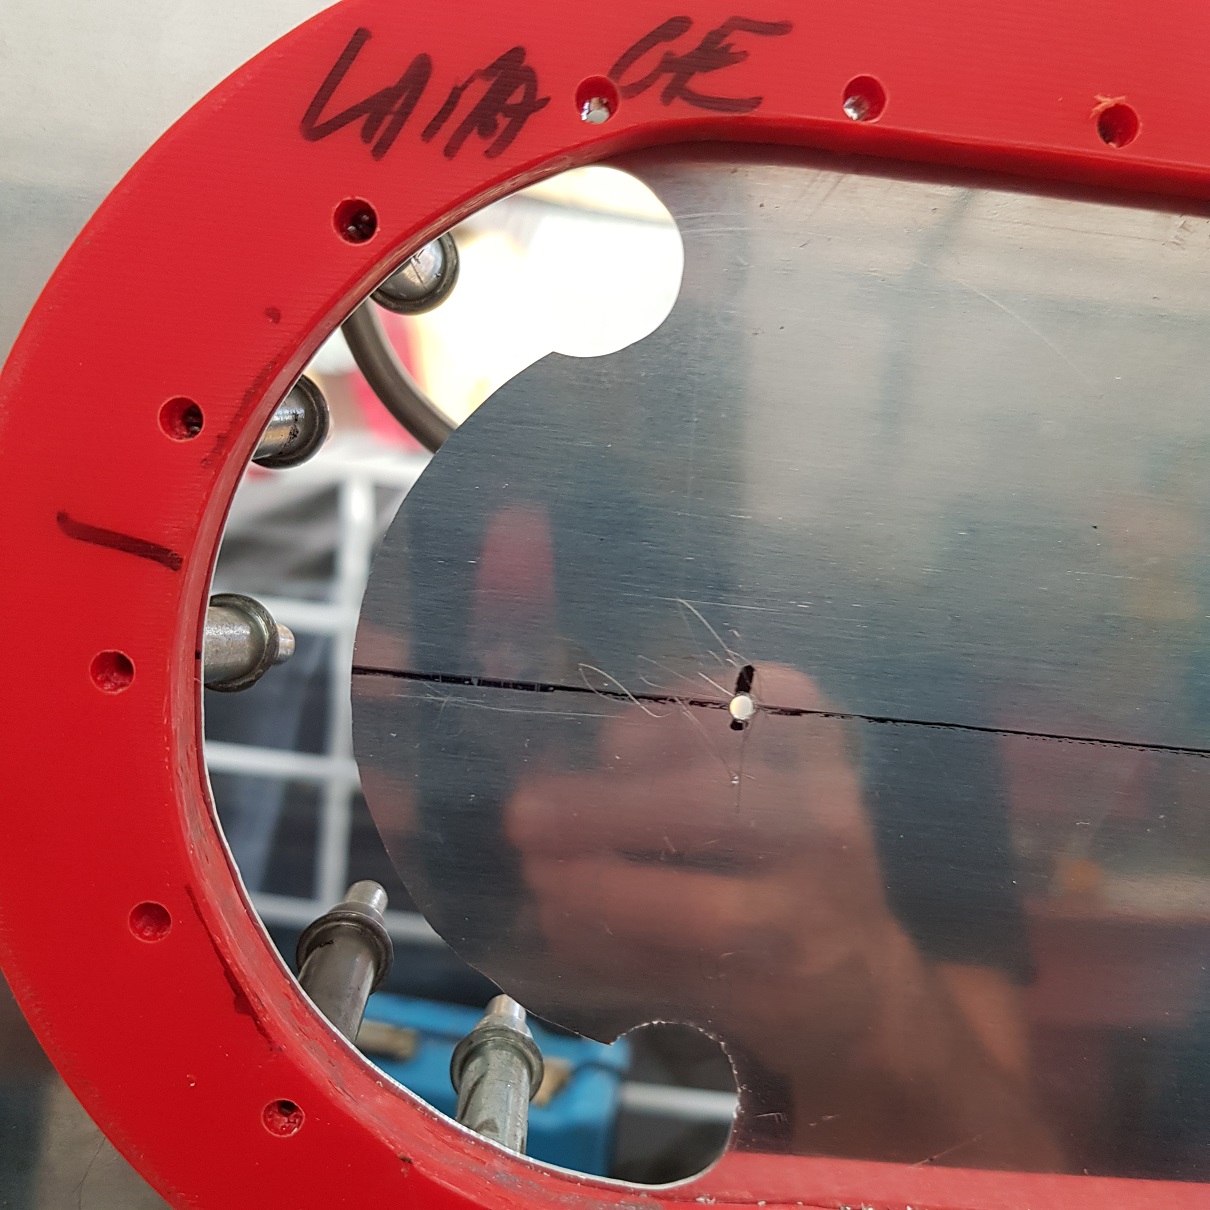
In March, Francis turned to working on his forward outboard wing sections (fuel tanks). Here are his wing tanks getting ProSeal and assembled:


Note the tool he uses to apply pressure to the wing skin. The long wooden board had foam taped to it and it is hinged off the wing jig on the bottom. At the top the blue strap goes over the top (aft edge) of the wing.


As if all of that were not enough, Francis picked up some side work this year helping the owner of a Yak-3 aircraft to get the airplane flying again. In his email, Francis said that the owner asked him to do some welding and riveting on the spinner and backing plate. Here are a few pics of the work in progress:


2. The Static Display Prowler - Well, I've had this Prowler sitting in my yard on wing jacks for a couple years now:

I happened to be in HFT one day and saw that their hitch receivers are not real expensive and are heavy duty enough to hold the weight of the airframe - a couple of times over. That should be a satisfactory safety margin! So, I found some 3/8" steel plate and cut them into shapes that will cover the 6 mounting holes:


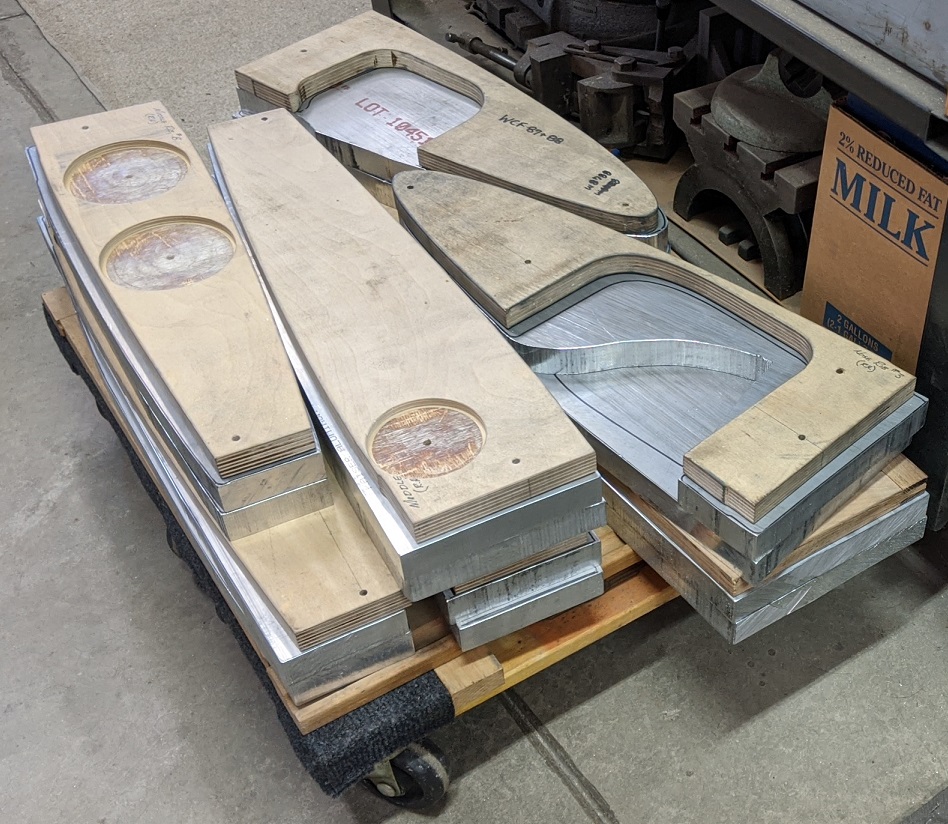
3. Ruff Cutting Prowler Part Dies - Recently, I have begun managing the process of making a large number of dies (form blocks) for making Prowler parts. I started cutting what dies I could with the 1" thick aluminum bar stock that I had in the shop. Here is the ruff cut set of the largest mid ribs from the center wing section (just outboard of, and below, the cockpit walls):


Here is the current stack of ruff cut dies waiting to get machined so that they can make Prowler parts:

Anyway, what I came up with was a list of 60 dies that will make the majority of the large parts that need to be formed for the wings and the fuselage. (Later on, there will be many smaller parts in the various sub-kits of the airplane that I will be able to make using a die and the press, but this current list will get the bulk of the wing and the fuselage finished).
As of right now, I have 17 of the 60 dies already completed (mostly outboard nose rib dies). Added to that, I have 14 of the 60 dies ruff cut and ready to start machining. That leaves 29 dies that I still need get stock for and to ruff cut. Last week, I placed an order for 2 bars of 1"x6"x12' aluminum; and 2 bars of 1"x8"x12' aluminum (almost 400 lbs). These 4 sticks got here yesterday. Here they are in the shop:

Now for some quick machinist math. I have 42 dies left to machine just for the wing and aft fuselage. Assuming that I have all of the computer work done to convert the CAD drawings for each of these dies into files that the milling machine can use to cut the dies, I can usually get one large die done per day. [As a side bar: For each die, it usually takes me about a 1/2 day to get the cut files processed, written, tested and ready for the mill to start cutting. I can get a lot of this done while I'm working the day job and sitting around in hotel rooms, etc. But, the testing has to be done in the shop at the machine.] As I get more proficient at cutting these things, I could possibly cut 2 smaller dies done in one day.
That means I'm probably looking at a minimum of 35-40 days of machine work to get these dies all made. With my normal work schedule at the day job, I can usually get 1 or 2 days a week in the shop. That means I could get roughly 4-6 dies made per month. At that rate, I'm thinking it will take 10-12 months to get all these made (in ideal conditions). Ugh!! It's going to be a long haul. Well, it will give my bank account time to recover from the aluminum purchase! Ha!
4. George's Early Prowler Drawings - In my last update, I posted about 3 drawings that I found that I believe were George's hand-drawn early concepts of the Prowler. At that time I had finished framing two of the drawings, but still had one left to find a frame for. Again, this was the first one I did using an "off the shelf" frame from Hobby Lobby:


Non-Prowler Items
5. Oldest Daughter Bought Her 1st House - After graduating from Univ. of Montana last year, our oldest daughter got a job working for the State of Montana. She discovered the USDA - Rural Development program and got pre-qualified for a home loan. She searched long and hard and just before the pre-qualification was due to expire, found a home for sale that met most of her important requirements. She and her realtor made an offer and it was accepted! It is a 40 year old manufactured home in pretty good condition, but needed some work. It came on a lot and a half in a small town called Superior, MT and it also came with a small guesthouse and a nice sized shop! Here is a pic from the property listing:

She also discussed wanting to be able to keep her horse there in the back yard, but was going to need a shelter for it. [She checked with the county and the laws do allow "riding stock" to be kept in residential areas.] I had some old steel pallet rack frames laying around that I scavenged from somewhere. I thought that they would work and I fabricated them into a steel frame that would make a shelter. By pre-assembling it in the shop, it could go together fairly quickly at her place and then all we would have to do is find boards to mount on three sides. After several day's worth of cutting and welding, here is what I came up with:


=> new laundry walls & flooring;


6. Youngest Daughter Solo Flight, Then Private Pilot - The youngest has been pursuing a flying career. She finished a year of college but has decided to delay the college for a while to get her pilot certificates and ratings. Here she is with her instructor right after her solo flight in early May:

And, her 1st solo landing:
After her solo, her (then) instructor was leaving for an extended time, so she "moved" her flying to the Lincoln Airport near SMF. Her boyfriend was working on his CFI certificate there so she went there to finish her PPL work. She took her oral exam in late Aug, but because of the smoke from the massive wildfires this year, they didn't have VMC conditions and were not able to do the practical portion of the checkride. Trying to get the practical rescheduled was problematic and went on for almost 2 months because of reduced visibility and DPE availability. But, FINALLY, on Oct 10, Crysta completed her checkride and became a Private Pilot! Here she is on that day with her temporary certificate:

7. New Porch/Deck On The House - The east deck on our house finally reached the point of disrepair that I couldn't ignore it any longer. Feet were actually, literally going through the deck boards! So, between putting things together for the oldest daughter's new house, painting a trailer and fixing a cantankerous old CNC lathe, I ripped out the deck and put new pressure treated stringers and deck boards on it. Here is the demolition mess with the deck location in the background:


8. Trailers, Trailers, Trailers - This has been the year of trailer work for me. I ended up with a total of 3-1/2 large trailer projects this year.
Trailer Project #1 - This project started in April when I got motivated to repaint my big tandem axle trailer that I use to haul my tractor and bigger loads. Take a look:


Trailer Project #2 - In August I needed to find a trailer that I could use to haul a bunch of equipment on a one way trip later in the year. After searching Craigslist for weeks, the only thing I could find was really old junky things that were way too expensive. But, I did find a fella that was selling a package of parts of trailer frames, trailer axles, springs, wheels and other stuff at a reasonable cost. It was a lot of stuff and there was enough to make at least two trailers, and maybe more. I worked the deal and got the stuff in the driveway in front of the shop. After surveying all the components, I started making the 1st trailer from a section of frame with a tongue attached, a pickup bed, and a lighter duty axle that didn't have trailer brakes. Here it is with the deck welded on and the springs and axle attached:
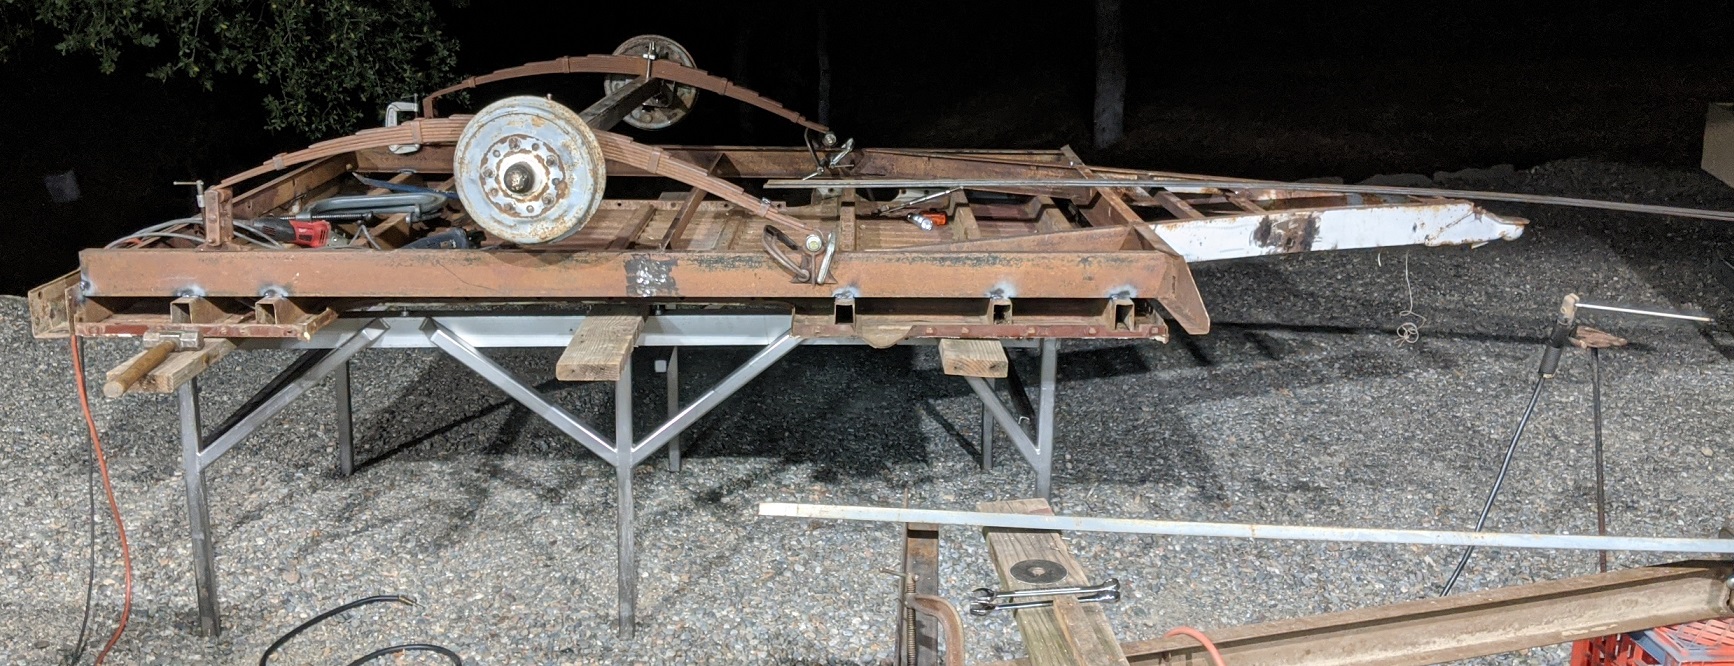


Trailer project #3 - This trailer was the one that would be used to haul a load about 2,200 miles for me. It was going to need to be a pretty heavy duty single axle trailer. I picked out the 3,500lbs axle that I got in the pile of trailer parts (this axle also had trailer brakes that I could use for this trailer). I had also gotten a heavy duty boat trailer tongue with the load of parts I got. So, I started putting these together with some additional 4 inch channel iron that I had so that I could see what it would look like:


[Oh, yeah. Trailer project #3-1/2. This (1/2) project is currently a collection of parts that is eventually going to become trailer #3 that I build. I have all of the parts I need to build another trailer except the axle tube and the springs. I've already done a fair amount of work to get these parts prep'ed and ready to go together. So, once I buy an axle tube and find some springs all I have to do is find the time to weld it all together! Watch for that in a future update.]
9. New Wisconsin Property - I spent 2-1/2 weeks in Wisconsin this July with my folks. I normally spend a little time with them before and after AirVenture each July, but with AirVenture cancelled this year I got to spend the whole time with them. I also got to do a little looking around for some land near them. (I had actually been looking online at properties for nearly a year, but this was a great time to finally go see some of them in person.) I was looking for something that did not have a house. I've already got one of those and have no desire for another one. I was also looking for some place where I might be able to store my RV (the other 50.5 weeks of the year that it's not being used in Camp Scholler). If it had a barn, or shop, or some kind of large building - that'd be a plus. And, if it had utilities - that'd be a home run!
After beating up the real estate listings and doing a lot of driving around east central Wisconsin, I found a property that I liked. It met most of my requirements: It's within 35-40 mins of my folks place, it's within 35-40 mins from OSH, it's 5 acres in size, it's rural, it has a 40' x 60' pole barn, it has a septic system, 200 Amp service and a well for water! Sweet! Oh, also, the east end is along a small river. I made an offer on the property the day before I left WI to head back home in CA in early Aug. On the 1st day of my drive home I got a counter offer from the listing agent and I accepted it. Closing was set for 9/11/2020. Here is a bird's eye view of the property with the approximate lot lines:


The day after I got there, dad brought my RV down and we got it set up and then started cleaning up. There was over 30 dead Scotch Pine trees on the property and myriad piles of trash all over in the woods that needed clearing out. Here is one of the days that dad and his tractor were on a roll and it was hard to keep up to them:


I'll head back to the property in the spring. I want to investigate the septic system more and figure out a way to set it up so that the RV can dump into it. In fact, I plan to build another building that is tall enough for the RV to park inside (the pole barn just isn't quite tall enough). I also have some other ideas about using this property in the future to stage Prowler "stuff" for AirVenture. I will cover that more in future updates.
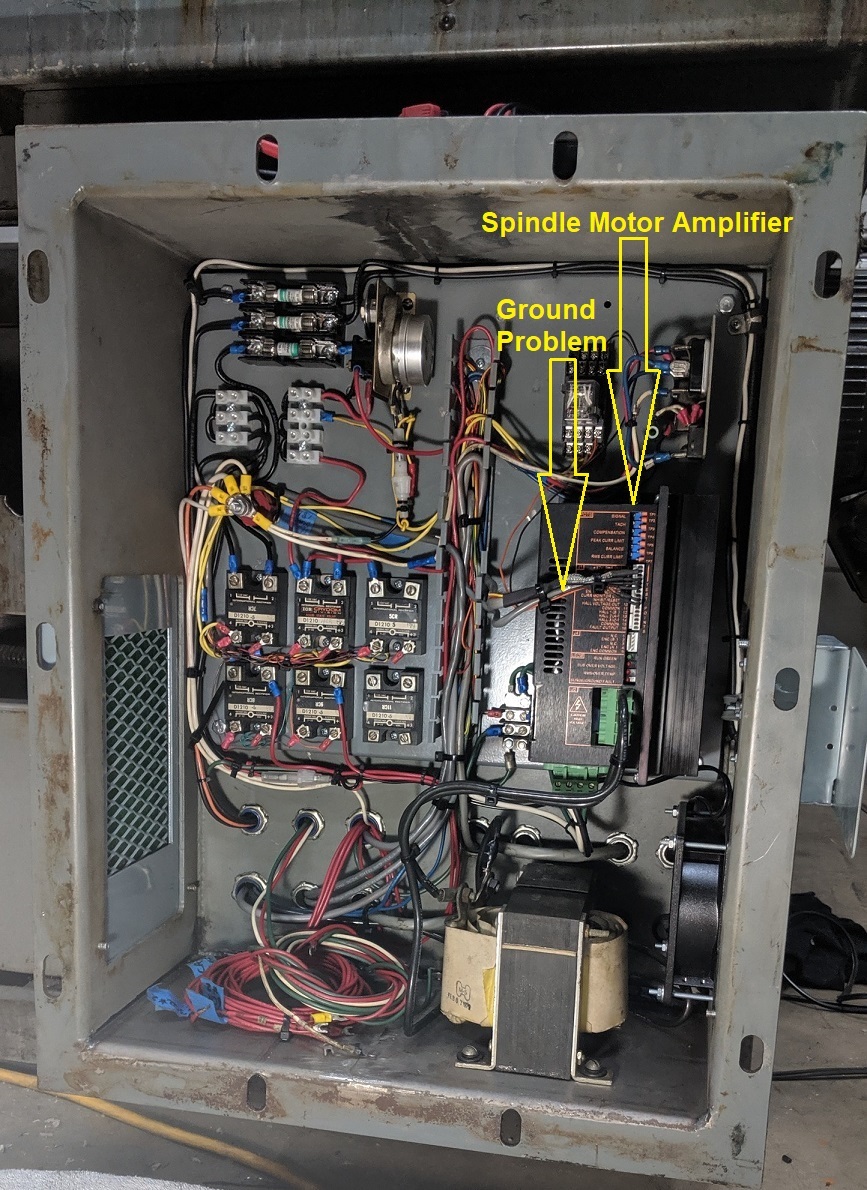
10. Hardinge CHNC Lathe Progress - My last post about this project was several months ago and just after I got the necessary electrical components moved out of the huge, old cabinet and installed into the smaller, more compact one. I had also just gotten the ballscrew bearings on the Z axis tightened up, got the home switch on the Z axis relocated and had rebuilt the entire X axis belt drive system on the end of the cross-slide. Here is what the machine currently looks like:

All along through troubleshooting this problem, I thought it was acting like it had an AC hum to me (interference from typical 120 Vac 60Hz power). But, I couldn't locate the source. I moved and re-routed some of the power wires, but nothing helped. Then, one day, I thought "What the heck." I would try to tune the amplifier one more time (tuning the amp is a process of electrically "matching" the motor to the amplifier to get the best electrical performance and response).
Doing this requires reaching into the electrical cabinet and balancing my left hand over the tuning potentiometers while holding a small screw driver and "tweaking" these pots. As I did this, my hand slipped at one point and brushed against the group of control wires going to the amp. Suddenly, for a second or two, the spindle motor stopped buzzing and sounded "normal". So, I poked the wire bundle again, and sure enough, for a couple seconds the motor sounded normal. Whhhaaaattttt!?!?!? Here is what the area looks like:
This was a major....albeit accidental.....breakthrough!!! But, I'll take it. Sometimes it's better to be lucky than good!! Finally, the machine runs like it should.....mostly.
While troubleshooting this spindle problem I also discovered that the spindle encoder was not working properly. In fact, someone had cut that cable completely in half!! Best I could figure out, the encoder stopped working (bad Zref channel) and it must have been causing the CNC to throw an error code. So, instead of fixing/replacing the encoder - they just cut it out of the system. Here is the old spindle feedback encoder mounted on the machine with the cannon plug removed:


I had to make the aluminum manifold that you see in the foreground. This gave me a place to attach air lines to and port the air to the correct passages machined into the cross slide. Next, I am going to source a 3 position air valve that will allow for 3 conditions: 1) pressure on the up air line and vent the down line; 2) vent both air lines; and 3) pressure on the down line and vent the up line. With this I will be able to get the turret completed. Mounting the valve and routing the air lines will be the biggest task here. More to follow on this.
Next on the list was the automatic collet closer. I just got started on trying to get this system to work again on this lathe. Again, I started with the maintenance manual and figured out a part that I am missing. It's the black hub part that is labeled V in this pic:

FINALLY - The End.
Well, that's all I have for now. I think this is the longest blog update that I might have ever done! Well, heck - it's been almost a year!! Anyway, as always, thanks for checking in. If I don't get an update done before the end of the year, I hope you all have a very happy, healthy, (Covid free) holiday season.


2 comments:
I stumbled onto this blog doing research on the airplanes. I am at a loss to imagine the monumental task you’ve set for yourself. The idea of building and flying a Jaguar is a pretty big dream, and a noble one. It’s another thing entirely to set out to manufacture, sell, and support kits. I applaud your determination and I hope you are successful. Your multiple property and family commitments are more than most guys could uphold. For the last couple of years I’ve marveled at how Mike Patey has built airplanes while simultaneously working full time and having many family commitments. Like him you must have something in your DNA that keeps you motivated. It’s admirable but hard to understand. I’ll be following your progress with high hopes.
Thank you for your kind comments! I really appreciate that! Sometimes it is not easy to stay motivated. But, reading comments like yours really helps! Many thanks.
Post a Comment