1. Sheet Metal Brake Update
2. Grinder Bench Fabrication
3. Plasma Torch Mods and Update
4. CAD work
5. Bryan's TW Strut
6. Forks for the Tractor
7. 30" Shear/Brake/Sliproll Fix
8. Next Update
The balance of the time since the last update has gone into working the day job and hasn't allowed a lot of time in the shop. On with the update:
1. Sheet Metal Brake Update - By far, the majority of the shop work in the past months has been working on the 8’ sheet metal brake. Here’s what it looked like after the restoration of what we initially got.
.jpg)
After completing this restoration of the existing parts, work began on the new parts that would be needed to build the missing top clamp. Using ideas from pictures of this same brake found on the internet and combining those with ideas from other existing designs (and a few of our own ideas), we came up with a plan. These are a few of the parts that were designed and machined to create an eccentric system that when rotated (by a handle) will create the lifting force to lift the top clamp (so the material can be slid into the brake).


 Here are those same parts cleaned up and installed on the brake. When the round part facing outward is turned, the bolt is lifted upward (because it is off center). The other end of that bolt is welded to the upper clamp of the brake. Below you can see where the handle was welded onto this eccentric plate.


Here’s a pic of the long top clamp pieces being installed onto the end plates. There is a piece of a steel beam (upside down “T”) that you can see one side of in this picture. That beam was cut lengthwise by our Prowler Plasma system. That piece of upside down “T” iron is what the rest of the upper clamp assembly was built around.

Here are a few pix of the almost completed brake. It still needs to have some “tweaking” done and also needs painting. Notice the stiff-backs that were added to the upper clamp assembly and the counter-weights that were fabricated for the folding leaf (to assist in bending the material). These were all missing when we got the base unit.


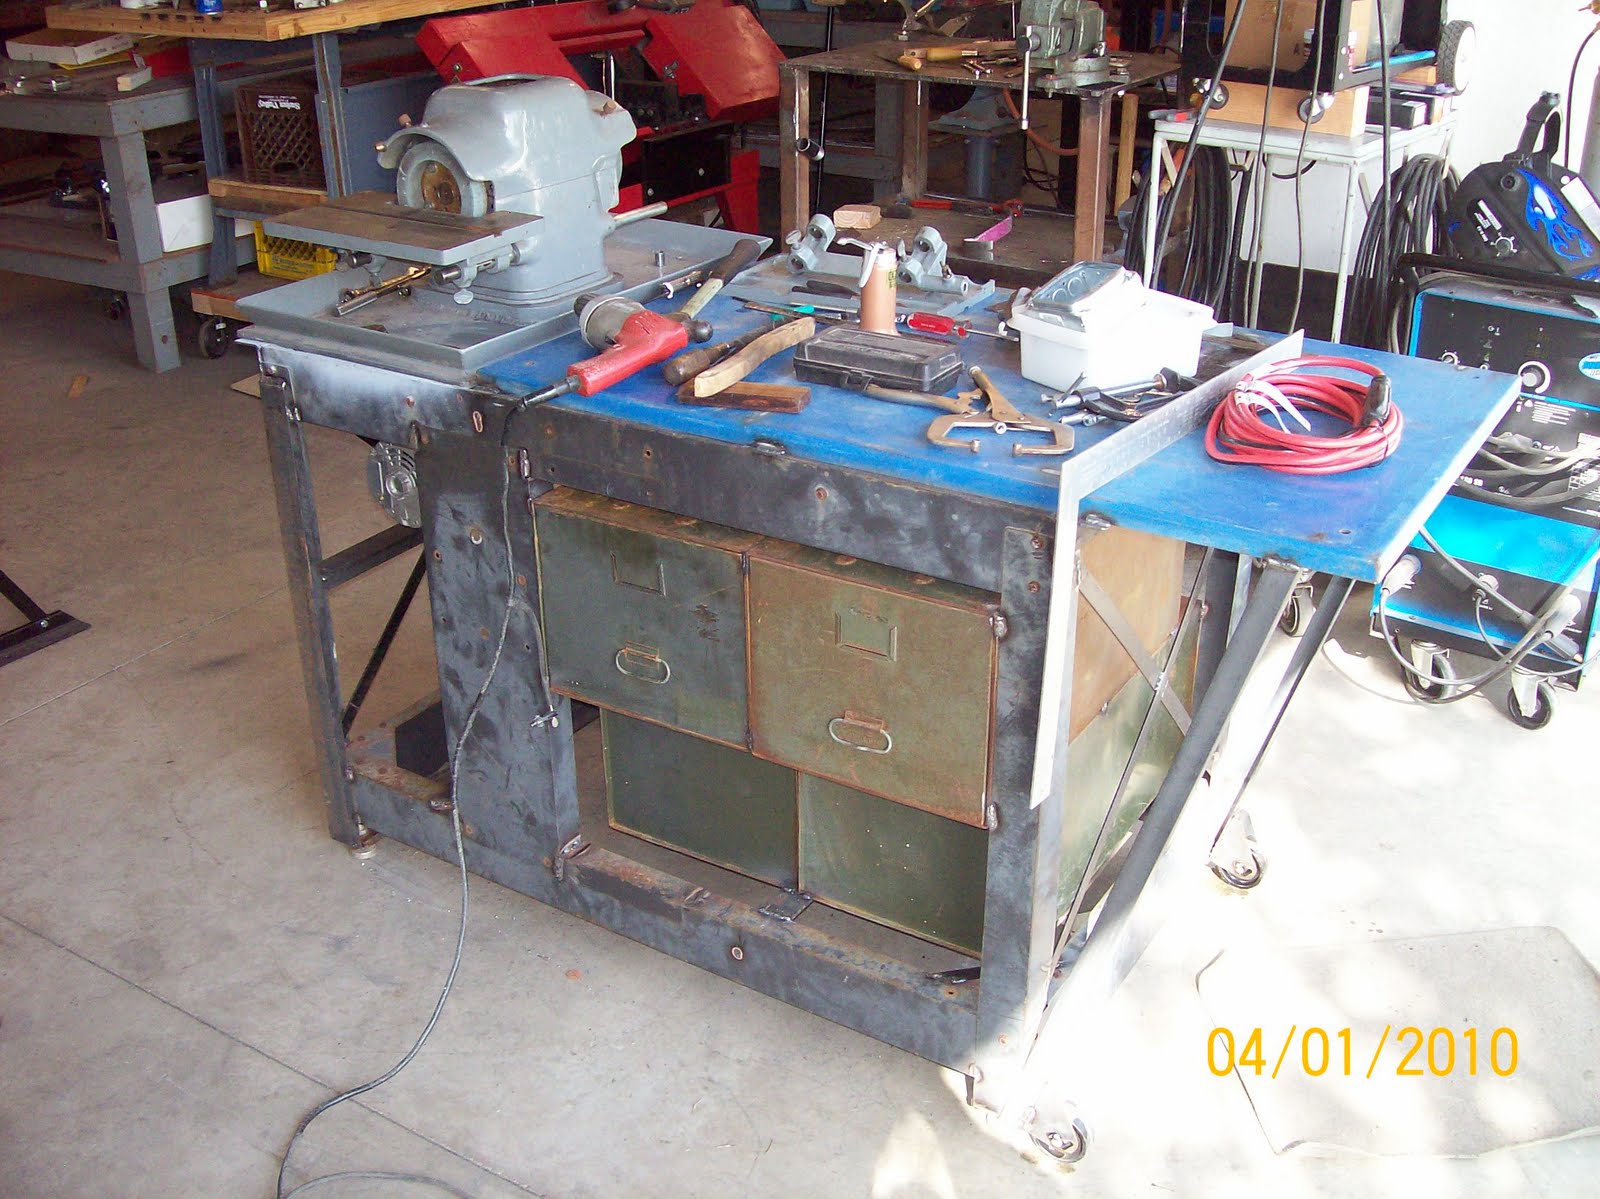
2. Grinder Bench Fab – As mentioned in an earlier post, we got this carbide grinder setup for free (for getting the sheet metal brake out of the gent’s backyard). The internal motor had burned out, but someone had modified it and set it up to be used with an external motor. The cabinet that it was mounted in when we got it was trash, so we pulled out the good parts and installed them into a new bench. There will eventually be several other bench grinders and buffers installed onto this bench so that all of these tools will be organized into a single, movable work station.


3. Plasma Torch Mods and Update – Because we built a new torch height control system for our plasma setup, the distance that the torch head actually stands off from the gantry and carriage had increased by about 5 inches. You can see the amount of stand-off in this pic.

That caused a problem with trying to cut long pieces in between the structure of the plasma table. Even though there was 8’-4” of space between the frames of the table, the torch could not travel far enough to the left to use all of this space in between the structure of the table. So, we had to extend one of the rails that the gantry runs on. It really amounted to cutting about 6 inches of this rail system off of one end of the table and mounting on the other end. Then moving the X axis gear track to the left the same distance. In this pic you can see this new extension piece after it was cut off the right end of the table and added to the left side of the table (and the gear track moved).

The problem is now solved and we are able to cut in lengths up to 8’-2”. As mentioned above in this post, we used the plasma torch to make one of the parts for the sheet metal brake. We cut an “I” beam in half the long way to make a “T” shaped part. The torch worked great and the part came out nice and straight.
Overall, the plasma setup is working really well. It’s also becoming more useful as we learn more about how to use it. We’ve gone from using 60A tips to using 40A fine cut tips and they work very well. So far we’ve only cut steel, but we’re going to expand into cutting aluminum sometime soon. Recently while cutting some parts for a friend, the auto height control system was proven to be working just as it should. It tracked around a long part maintaining a perfect cut height even though the material was warped over ½” from end to end.
Also, as we get better at processing CAD drawings into machine code (G-code) we are finding it quicker to make parts with the plasma setup than any other way. Hopefully this tool will turn out to be a great way to cut a lot of our parts. Speaking of CAD work:
4. CAD Work - Hundreds of hours are going into creating these CAD drawings of each part of the aircraft. Turns out that the easiest parts to draw are the ones with straight sides, angles, circles etc. that can be re-drawn from scratch. The parts we're currently working on are very tedious and time consuming. This is because they have curves that cannot be replicated in BobCAD. So the parts must be traced, scanned (with a large format scanner @ Kinko's) and then the scan imported into BobCAD. However, when the drawing is vectorized in BobCAD it does not become a clean, usable drawing. It's takes hours of cleaning up and detailing the drawing to get the shapes correct. Here's a screenshot of a recent part (center wing section middle rib#4):

Here's a close-up 3D view:

5. Bryan's TW Strut – One of the fun things we got done during this update period was completing Byan's TW strut. It was a very good project for us to learn "the ropes" on getting real machine work done. Overall, the project turned out great. Here's a couple pix of Bryan's Completed TW Strut.
.jpg)
.jpg)
Here's a couple of pix where he has it partially installed for testing the fit, etc.


Bryan said he was going to give us an A+ with extra credit, but we only ended up with an A+ because we had one bore that was just a smidge too tight and he had to file it out just a bit to get the bolt to go in. The new bore dimension is now noted on the drawing! Glad you liked it Bryan.
6. Forks for the Tractor – This project was not even on the agenda, but a set of forklift forks (with the rack for the forks) came onto Craigslist at a good price. We’ve wanted to have forks for the tractor, so we purchased them. It only took a little modification (and extension) to make them fit onto the tractor using the same pin points that are used to attach the bucket.


It works great! It will be very nice having the ability to lift shipments of 2024-T3 off of the delivery truck (someday).
7. 30" Shear/Brake/Sliproll Fix – In a previous post we showed this combination tool that we got at a great price. We’ll, the broken arm has been repaired and the unit now works fine. It still has to get mounted to a movable table or bench – but it’s now ready to work.
.jpg)

8. Next Update: In the next update we'll try to have a status update for each of the current builders. Bud should be close to his test flight. Chuck should be flying off his 40 hours. Ray has been testing hydraulics and electronics and is headed towards mounting his engine.
This update comes to you in the midst of the best landscaping time of the year in northern CA. Since we haven't had a green lawn in 5 years, the pressure is on (me) to get the landscaping and irrigation done @ the Prowler (West) homestead - before the ground dries out and gets so hard you can't drive a nail into it. So, there won't be a lot of shop work getting done for a while. However, the CAD work is portable and the day job provides time sitting in a hotel to work on that.
That's all for this update. Thanks for stopping by to keep an eye on us.


