Friday, December 28, 2012

Happy Holidays - Closing out 2012

Hello Everyone,

Merry Christmas (a few days ago) and Happy New Year (in a couple more days).  I have a few Prowler related items to report as we close out 2012. 

There have been a couple of high points this year in getting the company prepared to someday begin limited production of kits.  But, sadly, this has all been overshadowed by the loss of our friend Chuck Westcott in June.

I just checked and, so far (as of 12/28/30), there is still only a Preliminary Report of Chuck's accident on the NTSB website. Chuck's presence in our community is sorely missed.  The finality of this loss will become reality sometime in Jan when Ray and I will help Chuck's wife (Nancy) to clear out and dispose of all the remaining stuff in his hangar at the Salinas Airport.  I will report on that after it is finished.

On the up side, the two most important accomplishments for me this year were:
1. Completing the home-brew press brake and the fabrication of the outboard wing spar channels in March.  Being able to fabricate parts with long straight bends is very important in the fabrication of many of the Prowler kit parts.
2.  Completing the modifications (and repairs) to the 100 Ton "Rib Smasher" press.  While I am still currently working on testing this press (and the pseudo-hydroforming process in general), getting this press to operate is a huge step in developing the ability to form many kit parts from tempered aluminum.

So, in this update:

1. Bud's Latest Report
2. Ray's Latest Report
3. Rib Smasher Update
4. Retaining Wall Status
5. New (Future) Project

Let's get started:

1. Bud's Latest Report -  I've had a few email or phone conversations with Bud recently.  He has been hammering away at his "gripe list" and recently said in a quick email:
After 2 1/2 months of work, the Florida Jaguar is back in the air. Did a round robin to Lakeland today; the tail-wheel functioned as it was supposed to and the engine ran like a champ.

Then a few weeks later Bud wrote:
During the engine rebuild, I had to replace both sets of tapered bearings in the PSRU (one set fell apart in my hands).  Now, at Steve Rogers suggestion, I shut down in coarse pitch.  Before start, I crack the throttle and set the prop lever to full forward. Just before T/O, I cycle the prop. This procedure seems to be working well.

There were no detectable prop vibrations until I started working on cruise and endurance settings. Once I went below 2400 rpm the vibration started and became worse with lower rpm.  My initial reaction was prop balance, so I did a dynamic balance. The max allowable reading is .14; mine was .36. After balancing, the reading was .06.

The next flight showed that the balancing job had no affect on the vibrations I was experiencing. Play in the blade rotation was normal but pulling a blade fore and aft produced quite a bit of movement. I suspected the spacers in the prop hub but someone else noticed that the entire hub was moving. I thought that I was going to have to replace the PSRU bearings again.

George said to pull the prop and tighten the large nut to put more pressure on the bearings. Also, I removed the weights installed from the dynamic balance. This decreased the vibrations, but not enough. I added a second spacer on top of the bearing and now there is no hint of vibration until I go below 2150 rpm. Since this well within operation range, I'll stop there.

The airplane begs for a military paint scheme but mine will have to stay in the primer while I save my pennies.

Bud also sent some of his first photo shots aloft:
I have been helping Bud on a few of his aircraft issues, and I know that he has working really hard to fix the gripes that he's identified. It is great to see the reliability of his airplane improving so much. He is also getting close to applying for his final experimental certificate. Great work, Bud. I hope the new year brings you a shrinking gripe list.

2. Ray's Latest Report - Ray has been methodically solving his engine issues. The biggest issue has been the fuel control. His engine uses a diaphragm operated mixture control unit (essentially a mechanical fuel/air mixture computer). With the help of a local tech, the unit was evaluated, then removed and sent to the factory for modifications/repairs. It has now been put back onto the airplane and dialed in. Here is the latest report from Ray:

I finished up cleaning up the oil mess (from previous breather leak) today and got the engine running. It runs like it should now. Tomorrow I may have it out again for Warren to give it his blessings as completed.   If you will be able to get by in the next week or so I will still have it operational.   After that it will be blocked in by the wings while I slosh them with sealer. Still on the list is the door for the block heater. I think that I’m running out of things to be done here so it’s time for the painting to start. I think that right now flying should begin by late spring after I get some recent stick time.

Today the only thing was a small leak on the oil fitting from the oil cooler to the block. The new oil line going into the prop gear box appears to drop the oil pressure by about 5psi at idle and no difference at speeds above 800 rpm, this with 140F oil temp. The big thing was the fuel control. If the fuel /air ratio checks out OK it’s finished. The throttle response is sharp open and closed, no hesitation and the engine runs smoother from the better combustion. Starting will take a few tries to figure out what it likes. So far engine temps aren’t a problem, I can’t get it to really get very warm. Water temp never got above 150F, oil never got above 140F. This was with the cooling doors fully closed and OAT 55F. I think that it should run warmer with the cowling on.

Tomorrow it’s over to Jerry's welding to put on the mounting plate for the blowoff valve that I got from Vortech. It should take care of pressure differential on the throttle plate.

There it is, straight from the source.  Looks like late spring for Ray's 1st flight.  Here is another pic from my last visit to see Ray:
Nice work, Ray.  We are all elated to see you getting so close to your first flight. 
 
3. Rib Smasher Update - Now that I've got the hydraulics working on the Rib Smasher, it's time to start testing it.  I had a few minutes recently and I  put some hardwood into the box to give the press something to "push" against. Then I slowly ran the pressure up in increments.  Since I had run the press up to 3,000 psi when I first installed the hydraulics, the next goal was 4,000psi, then 5,000psi:
 
Then, I took the pressure up to 6,000 psi: 
That is as brave as I wanted to get for now - without taking more precautions in case something goes wrong. At 6,000psi I looked everything over and could not find any leaks and the system held pressure very well.  Sweet!

This is a lot of pressure! To give you an idea how much pressure this is, here is an example. My smartphone is about 3"x4" creating a footprint that is approximately 12 sq. in. If there was 6,000psi holding this phone down to the table, that would represent a force of 72,000 lbs. Imagine trying to pick up a 36 Ton cellphone!!!!

I will try to press some test pieces up to 6Kpsi and see if I need to go higher. If I do find that I need the pressure to go higher - I will do it from a "more remote" location.

While testing, I want to try to make a part (or parts) that I can use down the road. The first part that I selected is a bulkhead part that is under the cockpit floor just behind the main spar, shown here:
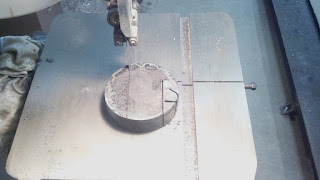
I chose this part to start with since it has straight sides and needs to have a lightening hole fabricated into it. This will give me an opportunity to figure out the best way to form the lightening holes and see how the radius works out on bending the 3/4" flanges of the part. The first step was to go to my folders of CAD drawings and find the drawing for this part.  Then, I used that to create a CAD drawing for the die that will make this part. Here is what that looks like:
Next, I made a 3D version of what the die will look like. I included the pocket that will help to form the flange on the lightening hole and the 4 small holes that will use pins to help hold the blank in place over the die during the forming process. You can see that here:
The most critical aspect of the dies that I will have to cut is the radius that the 2024-T3 blanks will be formed over. On a cross-section view you can see that here:
If the radius on the upper right hand corner is too sharp, the metal will crack instead of form around the radius. I am starting with a 0.125" radius (a 1/4" drill bit will fit nicely into the corner of the formed part). If I get too much cracking, I will have to go back and open that radius up to maybe 3/16" and try it again. Time will tell.  Also, as I have mentioned in previous posts, you can see the sides of the die are under-cut by 10 degrees.  This is to account for spring-back of the metal while forming the flanges on the parts.

I have to have rubber to put on top of the blank to form the parts using this process. Over the summer, I frequently stopped by my local tire store and checked the dumpster for tire inner tubes. I found 4 large tractor tires that I collected in a pile on the shop floor:
I recently cut these tubes up into smaller pieces, here:
I cut the inner tubes into roughly 12" x 14" squares. These will be piled directly on top of the aluminum blanks in the press. Then a large square of 1-1/2" thick rubber pad will be placed on top of that. I still have to make or find that rubber pad. I hope to cut my first test die and press my 1st test part sometime in early Jan. More on that later.

4. Retaining Wall Status - Before the weather turned completely sour and made it impossible to pour concrete, I was able to pour the last cap pieces on the 1st phase of the retaining wall behind the shop. Here is a picture of the major portion of the wall:
Here are a couple of the small corner pieces:

That's it for this project until sometime next spring.  Once the temps start to go up and the ground dries out I'll get out there and try to finish up this project.  Until then, I'll be in the shop trying to make Prowler parts.

5. New (Future) Project - Here is a project that I've been thinking about for a long time. The shop is out in the country and we have electric power supplied by Pacific Gas & Electric. Like most things in California, this state has turned PG&E into a means to fund more welfare programs. So, the cost of electricity is skyrocketing thanks to "Cap & Trade." In an effort to lower the power bill around here, I would like to run the high draw machines (mostly the mills and the MotionMonster) using a diesel generator. This will keep the monthly power bill out of the "Upper Tiers" of use that end up making electricity cost nearly $1/KWh.

In addition, since we do have occasional multi-day power outages (caused by a variety of factors), this unit will also serve as a back-up generator to power the entire property (house, shop, well, etc.).

I recently purchased this unit from a friend for a reasonable cost. The generator end and the control panel are in good shape, but the diesel engine needs to be replaced. More on this over the next year as I search for a replacement engine and get this beast running. Here's a pic:
Well, that's it for this update. I expect that most of 2013 will be a repetitive process of making dies, pressing wing parts and building the wing structure of the 1st "all digital" airplane.  I hope you all have a healthy and happy new year. Thanks for stopping by to check on our progress.

Tuesday, December 4, 2012

The "Rib Smasher" Lives!!!

Howdy Y'all

Welcome to our 50th blog post!  That's a small milestone for Prowler Aviation.  So is the topic of this update - getting the Rib Smasher operating.  Thanks for stopping by.

I had some time so I figured I'd do a quick update to include the accomplishments of my last trip home.  It rained most of the time that I was home, so I had no choice but to get some work done in the shop.  So, this update really only addresses the work on the hydraulics system for the "Rib Smasher."  (Pseudo Hydro-Forming Press is too wordy and just doesn't describe what it will really be doing!)

The current progress on the airplane is stalled on making the tip ribs.  When I have the tip ribs made, I can finish installing the wing spar into the jig.  To get the tip ribs fabricated, I need to have the Rib Smasher press built.  The press is mechanically complete, but still needs the hydraulic system installed that I outlined in the last update.

So, that means that the project at hand is to get hydraulics installed on the Rib Smasher.  First step is, you gotta have a plan.  In the last update I posted a hand drawing of the simplified hydraulics system.  Here is a cleaned up version of that drawing that more accurately reflects the system that I designed for the press:
In the previous version, there were two HP manifolds connected by a common hose.  I initially thought of that because I had most of the HP system already in tact from a previous application.  After further consideration, I decided that if I had to make a 2nd 3-port manifold anyway, I might as well just made a 5-port HP manifold and simplify the system.  But, then I also figured out that I could put the return valve "behind" the LP isolation valve and reduce the HP manifold by one port (ended up a 4-port manifold).  I'm glad that I did - it makes for a very clean installation.

Here are the parts of the system that I purchased from the local hydraulics shop:

That left me with with two 1/4" manifolds (one 3-port and one 4-port) to fabricate and one 3/8" HP 4-port manifold to make.  To make the 1/4" manifolds I found a piece of 3/4" steel plate laying around the shop and cut it into two pieces:

Then, I popped those into the manual mill and cleaned up the edges:

Next, used the DRO on the mill to space the port holes for them:

After that, I took them to the drill press to make the 1/4" holes connect all the ports internally.  Then used the 1/4" hole as a pilot for the 7/16" drill to enlarge the hole for tapping to the 1/4"-18tpi female pipe thread (FPT)

Here are the two manifolds with the holes drilled, but not yet tapped:

All that was left to do then was tap the holes. That's not the easiest thing to do. Pipe thread taps are tapered so, the farther the tap goes in, the harder it gets to cut the threads. That is done purposefully, as the tapered hole and the tapered fittings get very snug when put together - which is what you want when you are trying to contain 10,000 psi!   Here is one of the two 1/4" manifolds completed:

When the check valves that I bought online showed up in the mail, I could start to piece the system together to get an idea of size and spacing and how to install it all on the press.  Here is an initial assembly:
When I initially laid out this system, I had planned on double ended 1/4" MPT ends on the check valves.  When I couldn't find all 4 of the same check valves at one place online at a reasonable cost, I switched to the (brass) ones shown in the picture above.  However, they have one end FPT and the other end MPT.  So, the gaps you see is where I needed 4 double ended MPT couplings to finish the connections.  I picked those up at the hydraulics shop the next day.

With the LP side of the system taking shape, it was time to switch to the HP side and knock out the 4-port manifold there.  To cut 3/8" holes into a manifold, using a piece of 3/4 steel doesn't seem thick enough.  So, I decided to use at least a 1" thick piece.  All I could find laying around the shop was an 1-1/4" circular cut out (surplus) that I picked up on the cheap at the local steel fab place.  So, I cut it up into a 1.25" x 2" x 3.5" block:

Again, cleaned it up on the Bridgeport manual mill and then drilled the ports and tap holes:

  Then tapped the 4 holes to 3/8" FPT:
The two small holes you see in the face of the manifold are 1/4" holes that are used to bolt the manifold to the side of the press.  The small hole you see in the end above the threaded hole is a goof.  That's what you get when you're not paying attention and start to cut the hole before you check to make sure it's on the correct side.  Fortunately, I caught it before I bored the hole too deep (only about 1/16" - and it didn't ruin the part.

With this complete, the easy part of the project was over.  Now, it was time to start spilling, dripping, slopping and squirting hydraulic oil - everywhere.  Try as you may, it is impossible to work on any hydraulic system without getting oil on you, on the floor, on the machine, on your tools, and generally on everything.  If you think I'm kidding, just wait until you try your 1st project.  If you already have this experience, then you know what I mean!

Anyway, I started with assembling the HP side of the system.  I had to take apart the old system and reassemble the HP hoses, the HP manifold, the LP isolation valve, the HP/LV pump and, of course, the 100 ton ram to create the system detailed at the top of this post.  Here is a (out of focus) picture of the system installed on the press.  It is not a great pic, but you can see the major HP components:
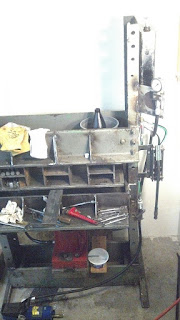
The manifold is mounted on the side of the press at the right.  The hose going off the back (right side)of the manifold goes down to the aux port on the far side of the 100 ton ram (red).  The brass plug on the aft top port is where the HP pressure gauge will be installed.  The LP isolation valve is threaded directly into the forward top port and has the handle facing out toward the operator.  And, finally the blue HP/LV pump is threaded into the bottom port on the manifold.  The plug was installed so that I could test the HP system before moving on to plumbing the LP side of the system.  I eventually got the air out of the HP side of the system and the pump and the HP side finally tested satisfactorily.

Moving on, I began work on the LP side of the hydraulics system.  After trying several iterations on and off of the press, I found the combination of plumbing that allowed the reservoir tank, the manifolds and the check valves to all be mounted neatly on the side of the press.  Here is another not-so-good pic:
In the above pic you can see the bottom of the reservoir tank (top).  The plumbing and valve on the back (right) side is the feed from the reservoir down to the intake check valve manifold.  I had initially bought a hose for this connection, but decided to  hard plumb this connection  with 1/4" pipe fittings to save space.  This part of the system does not hold any pressure, so I could just use basic steel pipe and fittings.  The Tee's in the middle have a check valve on either side and the unconnected ports eventually got hooked-up to the manual pump.  In the foreground you can see the output manifold and the hose that takes the hydraulic fluid down to the LP isolation valve on the bottom side of the manifold.  On top of that manifold is the recirc valve and  hose that takes the fluid back to the top of the reservoir tank.

This picture shows the connection of the LP side of the system to the HP side of the system via the LP isolation valve:
In order to have room to get back in the corner to install this stuff, I had to remove the manual pump.  It attaches with the two bolt holes you see in the side of the press.

Here is a pic of the entire system.  You can see the manual pump has been re-installed with the hoses that curl and go up to the Tee connections discussed above.  Again, it's not a great pic but you get the idea:

The hardest part of assembling an installed hydraulic system is getting the air out.  When the components are hooked to a several hundred pound steel press - "burping" the system can be a little challenging.  But, I got a lot of the air out by pre-filling most of the components before assembling them.  Then the rest of the air has to be either: A.) cycled out (and into the reservoir) by recirculating the fluid with the pump; or B.) individually loosening each part and then turning, twisting, shaking or otherwise moving it to try to get the air pockets to move to the "high" side and out of the system. 

Once I did that, I was able to test the entire system and eventually got the press to hold 1,000 psi with just the manual pump alone!  See it on the gauge here:
Later, I got the HP pump to get the HP side of the system up to 2,000 psi without any leaks.  Now, I will have to continue to test to higher pressures in steps - eventually working up to full pressure.

So, this is a big step in the progress of Prowler Aviation.  If this press is capable of forming wing ribs, fuse formers, etc. (as I hope it will) - this is the last major part of the production process required to someday start making airplane parts for kits. 

There still is much to do, including:
1.  Finish pressure testing the hydraulics system to ensure it doesn't leak (up to 10,000 psi - if possible).
2.  Make sure that the press will mechanically handle the 100 tons of force created by the 10,000 psi.
3.  Chop up the several large inner tubes that I've scavenged up over the past year into pieces to be used in the press while making parts.
4.  Buy or make a heavy rubber pad to go on top of the inner tube pieces that will help distribute the pressure from the top platen (top of the box) into the inner tube pieces and then into the parts.
5.  Start cutting some test dies, test blanks, and forming test pieces to learn how to form these parts (keep the metal from cracking, etc.)

 Then, assuming the tests go well,  I can start to make the 1st parts - the tip ribs.  That will involve cutting a full sized die for both the LH and the RH tip rib.  I've discussed this some in a previous post, and I will again when I get to that point.  So, stand-by for more on this.

There will be a lots of die making.  As I begin to decorate the spar with all of the nose ribs, mid ribs, longitudinal and transverse bulkheads, etc.,  every formed part of the airplane will have to have an individual die made to use in forming the that particular part.  I don't know the exact count, but my best guess is probably about 200.

Retaining Wall Sidebar - There was one day while I was home, that was nice enough to try to get some work done on the wall.  I mentioned previously that our dirt in northern CA is like "Marshmallow Fluff" when it is wet.  Well, as I was clearing some mud so that I could remove the forms from the recently poured concrete cap pieces, I shot this short video clip:
This is what I have to deal with when it rains on dirt that I have disturbed.  Once it drains and packs back down over a summer, then the water runs off of it and doesn't get so sloppy.  But,  what a mess when you have to work with it like this.  Anyway, I got the forms off of the last concrete I poured and cleaned up the tarps that I used to cover the last pads that I poured.

That's all for this quick update.  Thanks for checking in.  I will attempt to get one more update done by the end of the year.

Friday, November 23, 2012

Happy Thanksgiving From Prowler Aviation

Hello Again,
Thanks for stopping by to watch the progress and Happy Thanksgiving (yesterday - sorry it's a little late).  I hope you all had a great holiday.  It's been raining this past 4 days that I had off of work, so no concrete work this trip home.  I did get into the shop a little and tied up a few loose ends with the plane building.  I also figured I could use the time to work on a blog update.  In addition, last week I had the opportunity to visit Ray for a few days and we ran his airplane both days while doing some troubleshooting.  So, I don't have a lot to include in this update, but here's what I got:
1.  Retaining Wall Project Is Rained Out
2.  Finishing Some Wing Jig Work
3.  Rib Smasher Hydraulic System
4.  Running Ray's Airplane
5.  Bryan's  Latest Update
6.  Fracis and Robert (Kit #11) Update

1. Retaining Wall Project Is Rained Out - Well, it's now officially winter weather in northern California.  When it rains more than 2 days in a row, it's winter!  That means that the ground turns to "Marshmallow Fluff" and you cannot walk on it or work with it.  If you don't have it packed down and graveled by now - you will pretty much have to wait for spring for it to dry out and become manageable again.  Before the rains started though, I did get most of the first tier of wall poured.  Here's what it looked like then with one section of cap put on:
Then, I got 2 more sections of cap poured on it.  Here's the cap poured on the south end of the wall:
In the second tier phase, I'll be going up with another 18 inches all along the back of the 1st tier cap.  Eventually, it will look like this cross section  along the entire retaining wall:
I also got 3 more sections of cap cut out of the bank and formed up, but couldn't get it poured before the rain started.  Here's what that currently looks like (notice the mud that has already sloughed off the side of the hill behind the forms):
I also managed to get (finally) the rain gutters and downspouts on the roof in the back of the shop.  Here's that:
 So, that's what's been keeping me tired and sore for the past several weeks!  However, since the rains are now upon us, I moved back inside and started to get a few airplane related things done again.  I had to walk around and stare at things for a while to help me remember where I was at with most of these projects (before I dropped everything to work on retaining walls).

2. Finishing Some Wing Jig Work - When I was fabricating the wing jig, I left some work to be done with the posts.  Namely, fabricating some "L" shaped reinforcing plates and putting them in place on the posts.  Here's the plates that I fabricated from 1/4" steel plate:
These just help stiffen the 90 corner from the jig feet to the posts.  Here is a pic showing where they will go (approximately):
On the wing jig there are supporting posts in three places: 1) at the wing tips;  2) at the wing junctions; and  3) in each MLG wheel well.  On my wing jig the wing tip posts and the wing junction posts are welded in place.  But, the post in the MLG wheel wells have to be made removable so that you can test the MLG once it is installed into the wing.  Here you can see the center posts with the plates drilled, tapped and bolted on (center) and the wing junction posts with the plates welded in place (front and back):
Finally, one more small job done that has been "hanging fire" for a while.  These plates really made a big difference how rigid the wing jig is now, compared to without them.  Excellent.  On to the next job(s).

3. Rib Smasher Hydraulic System - It's time to get going on the hydraulic system for the 100 ton rib smasher.  I started by spending an evening trying to figure out the most simple way to plumb all the parts that I laid out in this system schematic that I posted in the last update:
Here is the hand-drawn version of what I came up with:
The check valves come as double ended 1/4" MPT (Male Pipe Thread), so they will just screw into each of the 4 ports on their respective manifolds.  Then, the two TEE's will have female connections on all 3 sides, except that one of the opposing sides will have a swivel fitting.  That one swivel will allow everything to thread together and make one complete rigid unit (2 manifolds, 2 TEE's, and 4 check valves) to mount onto the side of the press between the reservoir and the pump.  (You can see the tank and pump mounted to the press as you read further below).

I decided that the most economical way to get this system built would be to order some parts and make the rest.  The parts to order are: five 1/4" hoses, 2 adapter fittings, two 1/4" TEE fittings and four 1/4" check valves.   The next morning I headed out to the local hydraulics shop and ordered everything but the check valves.  For those I went online and ordered them from Motion Industries - I'd previously researched them online.  The items I will fabricate include a hydraulic reservoir and 3 manifolds. 

Next up was getting a start on the manual pump.  The manual pump that I bought online was apparently a project that someone started, but never finished.  One side of the pump had a 1/4"x2" angle iron that was used to mount the pump.  But the opposite side only had a "floating" plate that wasn't secured in any way.  So, for starters, I fabricated 2 angle iron clips to weld to the existing angle iron side of the pump to allow for easier mounting to the side of my press.  Then, I fabricated 2 pieces of flat steel with nuts welded to one side to mount on the back side of the pump that would hold the position of the plate on the other side.  After that, I aligned the "floating" plate and welded the ends of the flat steel to the far side plate to keep it in position and make it not "floating."  Now, two short 1/4" bolts hold the whole assembly together.  It worked well, check it out:
 Here is the unit installed on the side of the press:
 From there, I moved on to the fabrication of the reservoir.  I started with a piece of 3"x4" steel tube that I got for nothing from a local fab shop.  It needed some cleaning up, but the price was right.  I cut off two pieces that were 12" long each.  The first one looked like this:
Then I cut one side off of each of the two pieces so that it looked like this:
 Then I joined the two halves and filled in the holes to make the main body of the tank:
Next, I fab'ed the bottom plate and a 1/4" female pipe bung.  Here it is just before welding:
 Later, I fab'ed the top with a fill hole and added another 1/4" return line bung on one side near the top.  Here's the tank after welding it all up:
This was my first experience with building a liquid tight tank.  I figured that I should probably give it a leak test before mounting it.  Good thing I did!  When I first filled the thing with water - it leaked like a sieve.  It turned out to be quite a task in repetitively filling, checking, grinding, welding (many times) to find all the hairline cracks and get them patched up.  I am (admittedly) not the best welder, but I didn't think welding would leave so many hidden cracks.  I finally got it sealed up and I left it filled with water over nite to make sure that there weren't any slow leaks. It passed, eventually.   Here's the tank during final leak testing. 
And, here is the tank mounted to the side of the hydraulic press:
 Now, I am waiting for the parts to show up from the local hydraulics shop and the online order.  In a few weeks I should be able to get some time in the shop and start putting all the pieces of the hydraulics system put together. 

Schedule Sidebar - It will be a while before I get back into the shop.  I'm working the day job almost steadily until the 2nd week in Dec.  Then, my first 4 days off in Dec I'm going to take a truck and trailer down to Salinas and help Chuck's wife (Nancy) dispose of the stuff in Chuck's hangar.  Nancy has finally gotten the myriad necessary things done after Chuck's death and is now ready to tackle cleaning out the hangar. 
Several folks have spoken up and want to buy many of the tools and machines that Chuck had in the hangar.  I'm going to help her get the big things down, out of the hangar and delivered to the next owners - as needed.  Then, when everything is gone that everyone has spoken for, I'm going to purchase all that remains in the hangar from her.  It will be a lot of hardware, fittings, small hand tools, sheets of metal, shelves, etc., etc.  I will eventually be able to use all of that stuff in the Prowler business, so I'll load it all up and take it back to the shop.  And, it helps Nancy out so that she can turn the hangar back over to the city.  That project will keep me busy and I'll be "building the company" (so to speak), but not directly working on the airplane for a while.

4. Running Ray's Airplane - I was really fortunate to have a few days down in LA "on call" without having to actually fly and made it out to see Ray and his airplane again.  His wife was out of the county on a trip and we took advantage of the opportunity to hang out, talk Prowlers, and burn some gas with his airplane.  I took several videos of the engine runs, but my camera video lacks great quality.  Also, you'll see that my camera strobes the prop and makes it look like it's standing still, but it is really running at 62.5% of engine speed.

STARTING VIDEO - In the starting video you will hear the airplane start and then die.  Ray says "This is what it does."  What he is referring to is that the engine is not (currently) idling very well at all.  The fuel control below about 1000 rpm is very unstable and non-linear.  The engine runs very rough below about 750 rpm (if at all).  The engine will start to die if you pull the throttle back much below 700 rpm.  You will hear that a lot through all of these videos.  When it's starting to die, you can try to tease a little more throttle in, and nothing will happen.  Then you try a little more, and nothing happens.  Then a little more, and nothing happens.  Then, you move the throttle just a bit and the engine will catch again and surge straight to 1200-1500 rpm.  Here's the aircraft starting:
There is a temporary aux fuel tank that is sitting on the ground (behind the RH main) that is tied into his fuel system in the wing.  Ray has it set up so that his fuel boost pump circuit runs the fuel pump that is tied to this aux fuel tank.  The fuel line from this temporary aux tank feeds into the same place that his main tanks feed into his normal fuel system.

WARM-UP VIDEO - The engine takes a while to warm up even on a fairly warm day in Ray's side alley.  Of course, the cowlings are off now, which helps keep the engine cool.  After about 3-5 mins of idle at or above 1000 rpm the water temp starts to rise.  Then about 10 mins in, the oil temp starts to come off the peg and eventually stabilizes around 140 deg.  In this video you will hear the engine spin down like it is gonna die, then it surges back up to high idle.  The fuel control technician thinks that the idle section of the fuel control head may have to have the idle springs, balls and diaphragms replaced in the system.  Right now, Ray is waiting to hear from the technician before he pulls the unit off and sends it back to the company to do this work.  Here is the engine running during warm-up:

CYCLING THE PROP VIDEO - Once the engine is warmed up, it will idle better at (and below) 1000 rpm.  We could get it to idle (rough idle) at about 750 rpm once it warmed up.  Then Ray began cycling the prop to warm up the hub and see what the effect was on engine oil pressure.  The prop control system seems to function nominally.  The change in rpm during this video is only due to the prop cycling from low pitch to high pitch and then back to low pitch.  These were all done at about 1000-1100 rpm. 

If you look closely the prop governor is located toward the back of the engine, just above two thick white ground wires.  As Ray is cycling the prop, you will see the prop control lever on the top of the governor (it lays on it's side) go downward (for the high pitch, low rpm setting) and the engine rpm will start to drop.  Then it will go back upward (for low pitch, high rpm setting) and the engine rpm will pick back up.  It takes a while for the rpm to drop on the first cycle, remember the oil in the prop control system is still pretty cool.  Then on the subsequent cycle, the rpm drop is much quicker.   Here is the video of cycling the prop:

HIGHER POWER RUN VIDEO -  In this video, the engine is already warm and Ray is starting again after a short shut down to chat about some observations.  After the engine starts, he runs it at a higher rpm for a while (about 1500rpm and 15" MP).  We found that when the engine speed is above about 1100 rpm, the throttle control and the engine response is pretty linear - meaning that if you advance the throttle a little, you will get a little increase in the engine rpm, etc.

This engine is powerful!  I didn't get it on video, but on one start the engine surged pretty harshly and the prop wash literally blew the gates open behind the airplane (you can see the gates on the last video).  The gates are steel framed and wood covered.  The prop wash bent a 1/2" steel pin that goes thru the steel frame and into the concrete drive to hold the gate shut!!  I began to imagine holding the stick behind that much power in the air.  Should be fun - someday.  Here is the start and a higher power run:

VIDEO VIEW FROM INSIDE - Here's some video from over Ray's shoulder while he's testing the LH and RH ignition systems.  The Dynon's are not on in this video (he turned them on later), so all you see is a reflection in the top screen.  The engine tach is on the upper right side and you can see it's pretty steady on about 1100 rpm.  You will see Ray changing the ignition from both, to LH to RH and back on the lower right side. I'm not sure what the black button is that Ray pushes in the video - I'll have to ask him the next time we chat.

He has installed UMA gauges for all his engine parameters.  The lower row of gauges on the RH side are (from L to R):  Oil Press, Oil Temp, Water Temp, and then LH and RH fuel quantity.  Between the LH and RH fuel quantities is a switch to switch the fuel quantity indicators from the aft main tanks to the forward tanks in each outboard wing section.  Above the RH fuel quantity gauge is the Aux fuel quantity gauge (but you can't see it in the video as the canopy handle blocks it out).  All of them are currently not hooked up and showing off scale above full.

Then, above the LH fuel quantity is the the Fuel Flow gauge.  It used to be Fuel Press, but Ray replaced it.  The fuel control technician recommended the fuel flow, as having fuel flow indications will help them map the engine and finish the set-up of the fuel control system.  It's a very handy gauge to have!  The small UMA gauge above those two is the alternator/battery volts.  Then, the larger instruments to the left of that is the Engine RPM (above) and MP (below).  Here is a view from the inside:

FRONT VIEW VIDEO - I took some video off of the tripod, so it's not as steady and I move around.  You can see the gate that I mentioned earlier in the background.  Just forward of the firewall you can see the intake for the supercharger.  That mates up to a NACA scoop on the engine cowling when it is installed.  And, here is a view from the front:

It turned out to be pretty productive time doing these engine runs.  Fortunately, Ray was able to arrange to get the local technician for the fuel control system out to see the airplane run.  I got to jump in and run the plane while Ray and the technician discussed what was happening.  As I mentioned earlier, he has decided that there is something that needs replacing or rebuilding in the idle control section of the fuel controller. 

Before the technician got out to work with us, Ray wanted to check his advance on the ignition systems to make sure that they were working correctly and not something that could be compounding the problem.  Here's a pic I took when we were putting the RH ignition back together:
Update - since I wrote the information above about running Ray's airplane, he has updated me a couple of times.  He has now sorted out the rough running ignition.  Turns out that there was a missing bushing on the right distributor that was allowing the ignition to get much to retarded at low idle speeds.  He's replace the bushings in the distributor and reduced the high rpm advance to about 27-28 degrees BTDC.  He reports that the stable idle speed has dropped about 200 more rpm and there now is no noticeable difference between the L and R ignitions.

He also has taken his hydraulic pump out and is working on reducing the output pressure that the pump puts out.  It was making a lot more pressure than was necessary to swing the gear, and he wants to get the pressure output more closely matched to what is actually needed to operate the gear.

The fuel control body will come off of the airplane soon to send to the manufacture to get rebuilt and adjusted for this application.  While that is happening, Ray is going to begin prepping the aircraft for paint and coordinate with the fella that is going to paint the airplane.  They're going to work out what paint, the paint scheme, and logistics to get the job done.  More to follow as Ray approaches his first flight sometime next spring.  Nice work Ray!

5. Bryan's Latest Update - I am constantly astonished at how fast Bryan continually makes progress on his airplane.  His latest creation was a forward baggage compartment in his Prowler.  Since he is building his airplane around a diesel engine option, it provides him with some opportunities to do some things that the typical V8 engine project will not allow.  The two most notable of these are:
1.)  The ProwlerD only uses one wing radiator for water cooling, the other is used for oil cooling.
2.)  Because diesel engine fuel consumption is so much lower than gas, Bryan doesn't need nearly the same amount of fuel capacity as a conventional Prowler.  That alleviates the need to have an aux fuel tank in front of the instrument panel, like the conventional Prowler does.

Since Bryan doesn't need to have his aux tank in the fuselage (his is in one of his main inner wing tanks) - he has that room available for a good size baggage compartment up there.  That's important because he significantly reduced the baggage compartment behind the cockpit by placing the first aft fuselage former at a reclined angle.  He was able to provide quite a bit more room in the aft seat in the cockpit by reclining the back of the cockpit, but the trade-off was less baggage space, until now:
Nice metal work Bryan!  That makes a really nice baggage compartment space.  In addition to reclining the aft wall of the cockpit, Bryan added "cut-outs" in the sides of the cockpit where the aft pilot's legs will be when seated with the feet in the foot wells.  The will significantly increase the room near the forward pilot's hips where the aft pilot's legs normally "squeeze in there."  This was a very crafty solution to that problem.  Here' a look:
Here is a look at the latest revision of his instrument panel plan:
In addition, Bryan got his hydraulic unit back from the manufacturer and they didn't find anything out of specs with it.  So, it appears like the system is being "resistant" to a thorough bleeding.  More on that as it develops.

6. Fracis and Robert (Kit #11) Update -   I have exchanged a few emails with Francis recently.  You may remember that he and Robert are the new owners of Kit #11 that they purchased from Nicolas in France.  Here is one of the emails from Francis (with my changes in [ ] ).

Hello Todd, some news of (Kit) n°11
The "hangar" is finish but no electricity (7weeks that we wait) it's long!!  We need electricity for the jig and air compressor!

I have finaly find rivets in -7 for deriveting [re-riveting?] the spar (some rivets are not very nice).


For alodine I find some alodine in "gel"condition (for the main part it' s perhaps a solution for you).  When i make [built] my Skyote, there have a big spool [pool?] of alodine at my job (Air France) 6foot wide, 6 foot deep and 20feet long! Same one for deoxidine for the "hydraulique" aluminium tube of jet liner. 
But, they discard it!  So I find alodine in gel condition!

The french law for experimental autorized may be more than 200hp if we dont class in voltige.  We have bought a 200hp oldsmobile engine whith reduction unit and rear accessory box.  Do you now if there are bolt on on 350 chevy or rodeck?

Sorry for my english!
Francis


Thanks for the update Francis.  Please keep us posted on your progress.

That's it for this update.  I want to get it published and it's already a day later than I'd planned.  Thanks again, as always for stopping in to see how things are going here at Prowler Aviation.  I'll plan on one more update before the end of the year.  Until then, I hope you all have a very happy holiday season.