In this post:
1. Purchase of kit #11
2. Purchase of the Red/White & Blue aircraft and kit #13.
3. CNC update
4. Builder reference pix
5. Builder Updates
Thanks for checking in and let's get started:
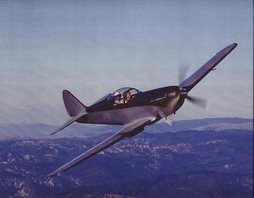
1. Purchase of kit #11 - According to our records, the "Old" Prowler Aviation produced 16 aircraft kits. These kits varied in completeness. Some were complete kits, several were not all that complete. In any event, kit #11 was a fairly complete kit owned by an individual in Prescott AZ. This kit was posted for sale on Barnstormers late last year and was purchased by Mr. Ben Armen. Ben is an airline captain living in PA. He as since taken possession of the kit, set up for initial assembly in Austin, TX, and has inventoried the entire kit. Ben has lined up assistance from old friends in Austin that will be helping him get started on his kit. Congratulations Ben. We look forward to working with you and assisting you in the building of your airplane.
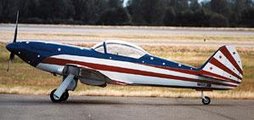
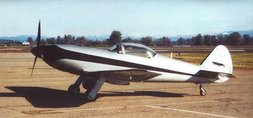
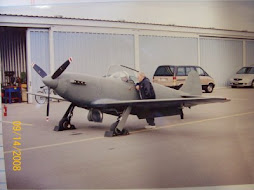
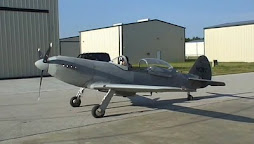
2. Purchase of RW&B aircraft and kit #13 - As we previously reported, the second flying Prowler (Red, White & Blue aircraft) was owned by an individual in Jacksonville, FL. This person also owned kit#13. Mr. Rick Pellicciotti of Memphis, TN has purchased the kit, the aircraft and all of the Prowler parts and pieces from the JAX owner. Rick and his wife have moved all the Prowler "stuff" to Memphis and he has begun his inventory as well. Here are some pix of the move:

 See Rick's website link (on the right side bar) for more information. We look forward to working with you and assisting you in getting your aircraft back together and kit built. We will post more about his plans once he gets his inventory done and has had an opportunity to come up with a game plan. Welcome aboard Rick.
3' Progress on CNC table - We have been spending a lot of time "burning electrons" on CNCzone.com (a great resource) and are getting a lot smarter about CNC tables and plasma cutting. As a result we have determined several modifications and options that we must add to our CNC table. The list includes: 1) add cable guides; 2) modify torch holder from a "manual" torch system to a "machine" torch system; 3) add an automatic torch height control system; 4) actually purchase and add the plasma torch to the table. Well, we took baby steps on this one and started with the easy one first:
 Cable guides are now installed and table tested. No more wires hanging off the ceiling!! The torch holder system mod is up next. Here's the "manual" torch holder before removal:
 We are investigating modifying this to a "machine" torch holder that will also be able to be used with the torch height control system. More to follow. Here's a pic of the current setup:

4. Builder Reference Pictures - Over the past several months we have had the opportunity to visit and work with builder Ray Seim. He has made his collection of Prowler pictures available to us for other builders to use as reference when working on their aircraft. These photos are of several of the completed aircraft and current kits at various stages of construction. It also contains many pix of single components being constructed which are very useful for builder reference. We have spent hours scanning and organizing these pix into a CD to distribute to our current builders. Many thanks to Ray for these photos, we really do appreciate this contribution. These will, without a doubt, be very valuable to our current and future builders!
5. Builder Updates - Here's a recap of the current builders that we have had contact with and the status of each aircraft:
Kit #1 (RW&B Aircraft) - Recently purchased by Rick and is currently being inventoried and developing a game plan to re-install engine and get the aircraft flying again.
Kit #5 - We recently discovered that George's 3rd aircraft appears to be kit #5 that was returned by a former owner. Airplane is airworthy, has flown, but is currently in "storage" and is for sale.
Kit #7 - This kit belongs to Bryan and has the wing almost completed. Bryan is getting ready to begin assembling the fuselage.
Kit #10 - This kit is owned by Ray and is in the 80% complete range. He is currently working on installing avionics and hopes to get the engine installed by the end of the year.
Kit #11 - This kit was recently purchased by Ben and has been moved to Austin, TX where it has been completely inventoried. Assembly will begin over the next several months.
Kit #12 - This kit is owned by Chuck and has flown. He is working on taking care of some issues and preparing another round of test flights.
Kit #13 - This kit was purchased by Rick at the same time that he bought the RW&B airplane. This kit is (in his words) "the 75% complete and 75% left to go phase." Inventory is underway and he will have a plan for this kit in the future.
Kit #14 - This is the airplane owned by Steve and has flown it's maiden flight with some follow on test flights. At last contact, Steve said he was working on some cooling issues and would be flying it again soon. That was late last year and we need to check in on Steve again soon.
Kit #17 (Sort-of) - This aircraft is being built by John "Cabi" Cabigas. We are calling this kit #17 since John purchased many left-over inventory parts as well as the engine and landing gear from George prior to our purchase of Prowler Aviation. His aircraft will be a collection of these parts, parts that Cabi is fabricating himself, and possibly some from us. Since it is still following George's techniques we are including it into the "Old" Prowler Aviation kits - as we are also doing with our kit.
Kit #18 - This is the kit that we are building. As mentioned above, we are including it in the "Old" Prowler Aviation kits since we are also using some left-over inventory parts from the old Prowler as well as our own parts that we are fabricating using George's techniques. Once we are actually set up for production - we will most likely switch to using some new kit numbering scheme. More to follow. We have a vert stab sub-kit that is being assembled and the wing spar is in progress. Total work probably represents less that 5% complete.
That's the latest and greatest. We work full time on this project when we're not working the "day jobs" so that we can get this company back up and running. We appreciate your keeping tabs on us and your support. Have a great 2009!
Kit #5 - We recently discovered that George's 3rd aircraft appears to be kit #5 that was returned by a former owner. Airplane is airworthy, has flown, but is currently in "storage" and is for sale.
Kit #7 - This kit belongs to Bryan and has the wing almost completed. Bryan is getting ready to begin assembling the fuselage.
Kit #10 - This kit is owned by Ray and is in the 80% complete range. He is currently working on installing avionics and hopes to get the engine installed by the end of the year.
Kit #11 - This kit was recently purchased by Ben and has been moved to Austin, TX where it has been completely inventoried. Assembly will begin over the next several months.
Kit #12 - This kit is owned by Chuck and has flown. He is working on taking care of some issues and preparing another round of test flights.
Kit #13 - This kit was purchased by Rick at the same time that he bought the RW&B airplane. This kit is (in his words) "the 75% complete and 75% left to go phase." Inventory is underway and he will have a plan for this kit in the future.
Kit #14 - This is the airplane owned by Steve and has flown it's maiden flight with some follow on test flights. At last contact, Steve said he was working on some cooling issues and would be flying it again soon. That was late last year and we need to check in on Steve again soon.
Kit #17 (Sort-of) - This aircraft is being built by John "Cabi" Cabigas. We are calling this kit #17 since John purchased many left-over inventory parts as well as the engine and landing gear from George prior to our purchase of Prowler Aviation. His aircraft will be a collection of these parts, parts that Cabi is fabricating himself, and possibly some from us. Since it is still following George's techniques we are including it into the "Old" Prowler Aviation kits - as we are also doing with our kit.
Kit #18 - This is the kit that we are building. As mentioned above, we are including it in the "Old" Prowler Aviation kits since we are also using some left-over inventory parts from the old Prowler as well as our own parts that we are fabricating using George's techniques. Once we are actually set up for production - we will most likely switch to using some new kit numbering scheme. More to follow. We have a vert stab sub-kit that is being assembled and the wing spar is in progress. Total work probably represents less that 5% complete.
That's the latest and greatest. We work full time on this project when we're not working the "day jobs" so that we can get this company back up and running. We appreciate your keeping tabs on us and your support. Have a great 2009!


 We found a day we both had some time and I went to visit him. We spent the better part of a day trying to flatten the "learning curve" on using his setup. The parts are still being worked on, but after seeing his machine work I realized that this is the way to go - when it comes to producing Prowler parts.


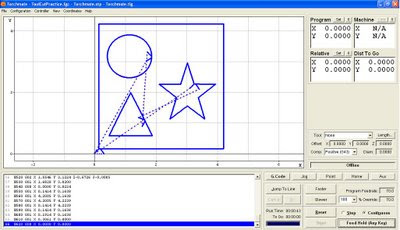
 The table came with the computer setup, but has had the hard drive reformated and a new operating system installed. The monitor has been replaced with an LCD monitor. We still have a lot more work to do before this becomes a useful tool in the Prowler shop. First off, we still have to purchase a plasma torch for it. I have been trying to learn how to use the software and I'm having some modest success. I have modeled my own "sample" part using the Torchmate CAD software. I have exported this file from the CAD software as a .dxf and then imported it into the Torchmate software that actually runs the machine. This software converts the "sample" part .dxf file into something called "G-code" which is what actaully makes the table move in the correct way to cut the part.

 When we get ready to make another airframe, it should simply be a matter of putting the metal in the machine, pull up the files, and hit enter. Without having done any in-depth research, the hope is that we (using our system and Cabi's system) will be able to satisfy our production requirements - when we get to the point where we can start selling airframes.


 Also, the pieces were scribed to the pattern and then cut just outside of the scribe lines. This leaves enough material to file down the edges to a smooth finish. Turns out this represents a lot of filing. So, on to a better way.
 2) Cut two 1/4" spacer strips for each pattern. One spacer strip goes under the entire stack and provides room to have a counter-sunk bolt head. The other is to provide room between the roller bearing (that rides on the pattern) and the actual cutting part of the bit . This keeps the pattern a good distance from the cutting edges and prevents chewing up he pattern. See pic in item 4 below.
 4) bolt the "stack" together and adjust the router depth to get the correct height for the pattern to ride on the roller-bearing:

 5) Make a
 The next item to work on are the bearing blocks. They are rectangular blocks that surround the bearing and are clamped under the wing attach brackets.

 By mounting the drill deck (table) under the bench top the drill can just penetrate into the bench top and (most importantly) the head of the drill press is now height adjustable above the bench top buy loosening the drill deck handle and adjusting it.
 Make sure to square the head of the drill press to the bench top. We used a

 Vertical Stabilizer Sub-Kit - Armed with the new spreadsheets, we now have an idea of what inventory items currently exists in each sub-kit and what we will need to fabricate to complete an airplane. The first sub-kit on the list was the vertical stabilizer. Turns out that we had all but about 4 parts we needed to


 Once that was done we drilled the skin and built a crate to ship it to the "
 Now it's on to the fabricatiion and
 This is the steel sheets, steel tubing, bearings, hardware, etc., needed to assemble the Tail Group Sub-Kits and the Wing Group 1 Sub-kits. Hard to believe, or maybe not, that including shipping this pile of stuff represents over $1K worth of materials. In some cases there is enough material to make more than 1 airplane, but some things have to be bought in a minimum order - so that's what ya get.


 This is laying out the fly cut for the torque tube hole in the end of the spar web. The torque tube for the gear will pass thru a bearing in this hole to support the top of the gear strut.


 I also have building lots of shelves and other organizational storage places. In this pic you can see the shelves for hand tools between the garage doors. There are more just out of sight in this pic. Also note the wing jig off to the right side of the pic.
 I also fashioned together an aluminum storage rack that also doubles as a pattern holder for all the wing spar patterns and drill jigs. Here you can see where the 4' x 12' sheets stand vertically in the storage cart.
 And here you can see the storage for the wing spar patterns and jigs.
 FOURTH - ALUMINUM IS ON THE WAY! We have ordered all the aluminum we will need to build the first Prowler. We actually thought we got the first part of our shipments on Sept 25th.
 Turns out this was actually a shipment of stainless steel that was destined for a company in Germantown, WI. A transposing of the last two numbers of a work order number caused it to end up at the shop by accident. It was pretty stuff, but stainless tends to make for very heavy airplanes!It has since been re-packed and delivered back to the trucking company. Our 3 deliveries will all be picked up on Oct 2nd. Wing spar building will begin soon.